Reflowing a Macbook Pro GPU to no avail

My 2011 Macbook Pro 17″ failed again. A few years back, the GPU went bad so I sent it to a guy in the UK that replaced the GPU, and then it worked for maybe two years. It failed again a couple of months back, but I don’t think it’s worth having it repaired now. I did, however, just do a reflow on it for kicks. It didn’t fix the computer, though, but that won’t stop me from describing what I did. So this is an example of what doesn’t work.

I first removed everything removable from the main board and set it up in a preheater. I stuck the Fluke thermocouple into a mounting hole close to the GPU so I could monitor the temperature of the board.
Continue reading “Reflowing a Macbook Pro GPU to no avail”

Battery replacement in an iPad Pro

Replacing the battery in an iPad Pro is a horrible, terrible repair procedure. It’s all about heat and glue. Jeez.

This sounds like a good idea, but it isn’t. I heated the iOpener in the microwave for 30 seconds on full power as prescribed and it was fairly hot. Let it rest on the iPad for a couple of minutes and the iPad turned maybe lukewarm. Or maybe not even that. It really didn’t work for me.
Continue reading “Battery replacement in an iPad Pro”

A very disinfected stethoscope

A couple of years ago I bought a Littmann 3200 electronic stethoscope. Love the thing. Fantastic (and adjustable) sound and recording capability and Bluetooth connection to upload those sounds to a companion app.

A couple of weeks back, the stethoscope started to glitch. Every now and then it would hard reset when I pressed the “-” button so I thought that was the end of it. I ordered a new one, planning on disassembling the old one once I had another good one. Today was that day.

Continue reading “A very disinfected stethoscope”

ESR

In the previous post I described another failure in my Razer Mako speaker system. I found a defective electrolyte capacitor and I said it started to “short out”, which isn’t correct. What happens is almost the opposite, namely that the internal resistance in the capacitor starts to rise, creating heat dissipation (which almost burned me) which ultimately destroys the capacitor. Meanwhile, before it actually gets destroyed, it becomes less efficient at doing its job of smoothing out variations in the voltage applied to it, which I saw as increased ripple on the corresponding power line.

Continue reading “ESR”

Razer Mako (no click of) death fix

About two and a half years ago, I wrote a post about fixing the “click of death” problem the Razer Mako 2.1 THX speaker system is prone to. My Mako worked fine until recently when it failed in another way, namely with no sound at all anymore. No clicks, nothing. While the “control puck” still kinda worked, it flickered and behaved weirdly.

Continue reading “Razer Mako (no click of) death fix”

Another couple of years?

My Mac Pro is an early 2008. Over the last few years, it’s been losing function by parts. It’s like chip rot. First the firewire didn’t work right, lots of transfer errors. It may even have been that way from the start, but I always thought it was the LaCie drives or firewire hubs that screwed things up. So I stopped using firewire entirely.

Then the RAID gave me trouble, which turned out to be disk bay 1 being flaky. With or without the RAID card, bay 1 would give me disk errors even after replacing the disk. The bad disks worked fine in other bays, though.

The last couple of months, the machine started beach balling a lot, getting so slow I would almost scream. Dragging selections in Muse could take ten or twenty seconds to do, while they were instantaneous on my Macbook Pro. USB started to be flaky about a year back, with bad sound quality and dropouts using a USB headset. A few years back the upper DVD reader stopped working, too.

After a couple of months, I reinstalled OS X to no effect. Running TechTool Pro and Diskwarrior on the disk had shown no significant errors, but it took forever. Very slow disk reading. I then moved my system disk from bay 4 to bay 3, and the beach balling went away immediately. So now I was down to two functioning disk bays.

I’ve been eyeing the new Mac Pro, but the lack of serious disk space keeps me from going for it. And the price, of course. Decent alternatives would be a second hand 2010 or 2012 model. Or, I figured, trying to fix my 2008. The only thing I could think of as being the cause would be the disk cable harness (unlikely), the motherboard, or the power supply. You have to start somewhere, so I figured a new motherboard would be a good thing to do. Turns out you can get them for a decent price nowadays. I found a vendor on eBay that has a stack of them for $165, and they claim they’ve been tested before shipping. So I bought one, and got it less than a week later.

Today, I switched motherboards. It’s a pretty invasive thing to do to your Mac Pro, but you can do it in two or three hours without rushing it. Nothing broke, and I’m writing this post on that machine a few hours later and everything seems to work. I’ve moved the system drive to bay 4 and the machine remains snappy. No beach balling. I’ve installed a 4 TB in the previously really bad bay 1, and it seems to work normally. I’m having a glimmer of a hope this machine will work fine for another year or two, or maybe more. At least until Apple releases a decent modern replacement (if ever…). Below you’ll find a few pics of the process.

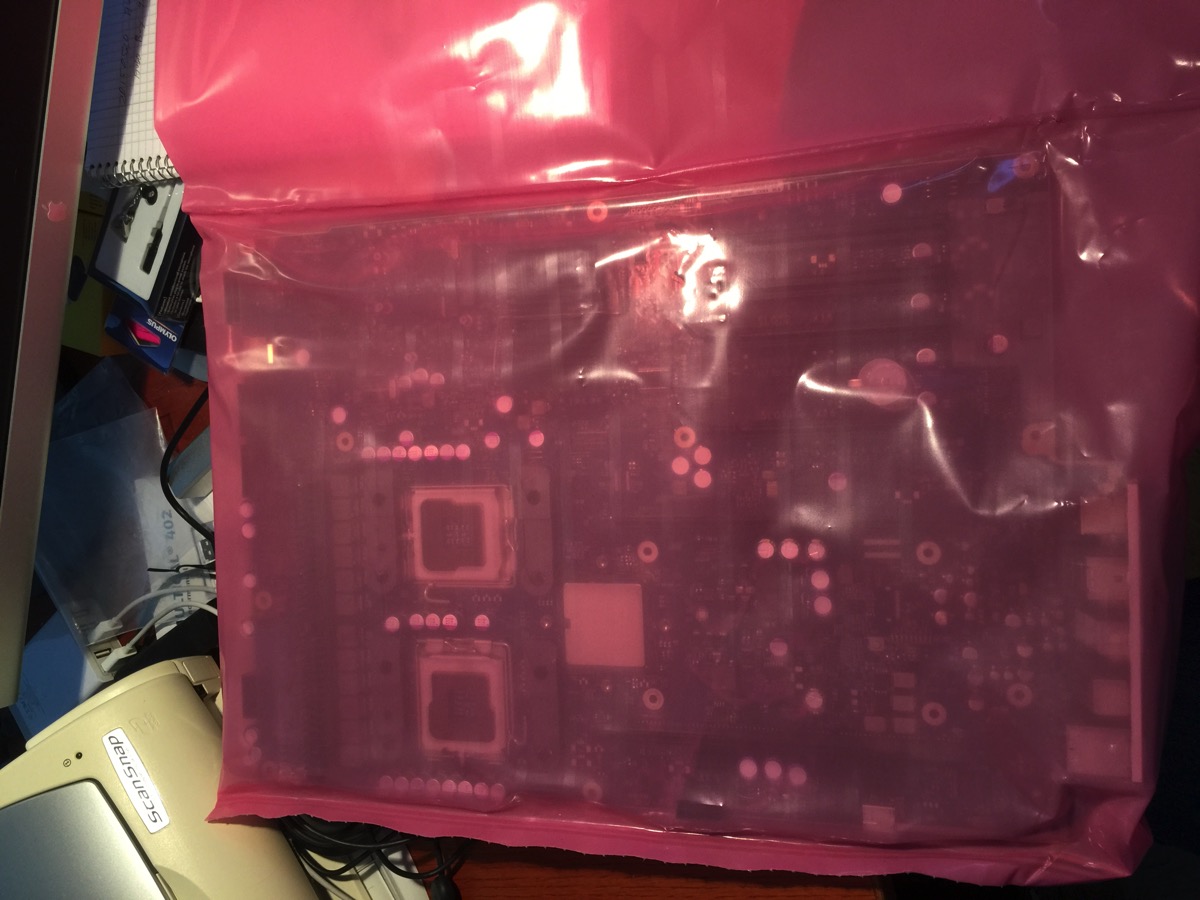
The new board arrived completely intact and well packaged in a sealed antistatic bag.
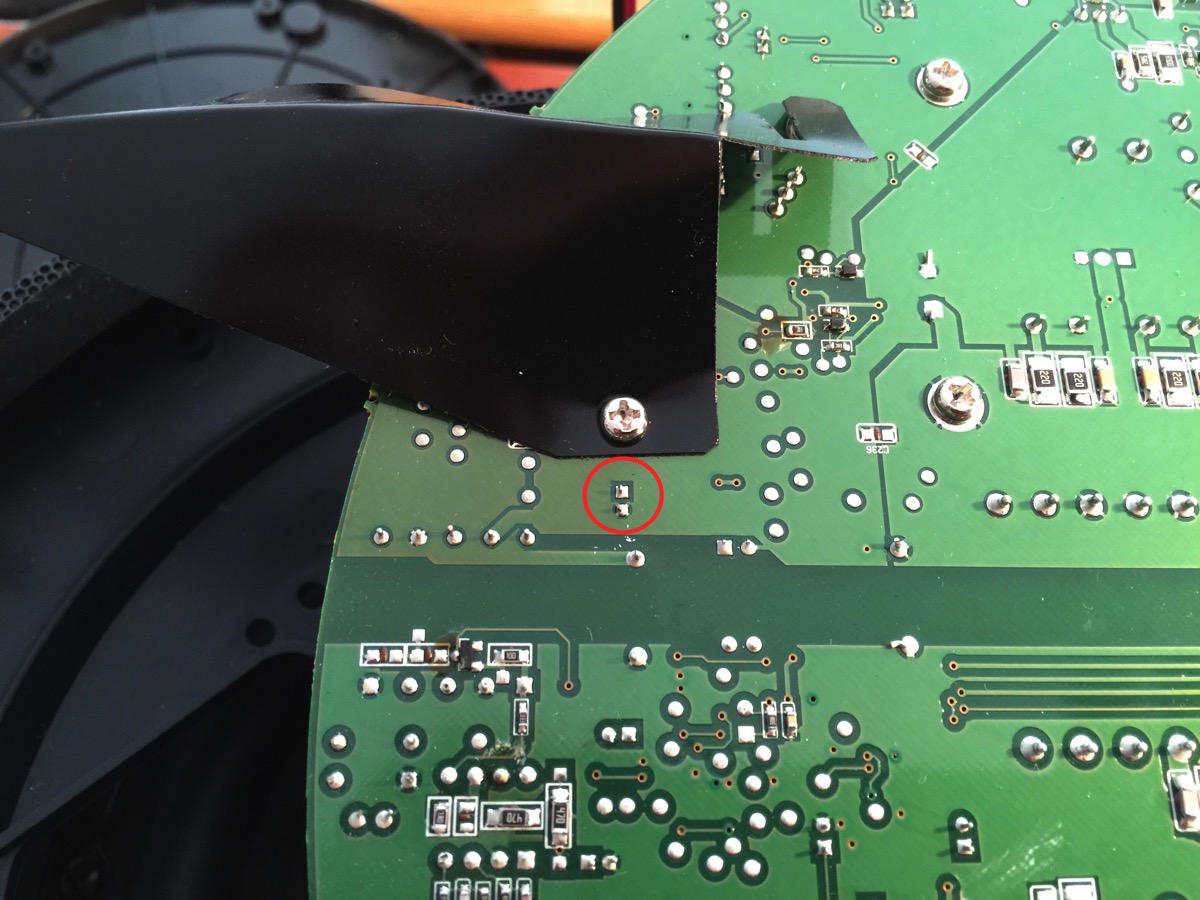
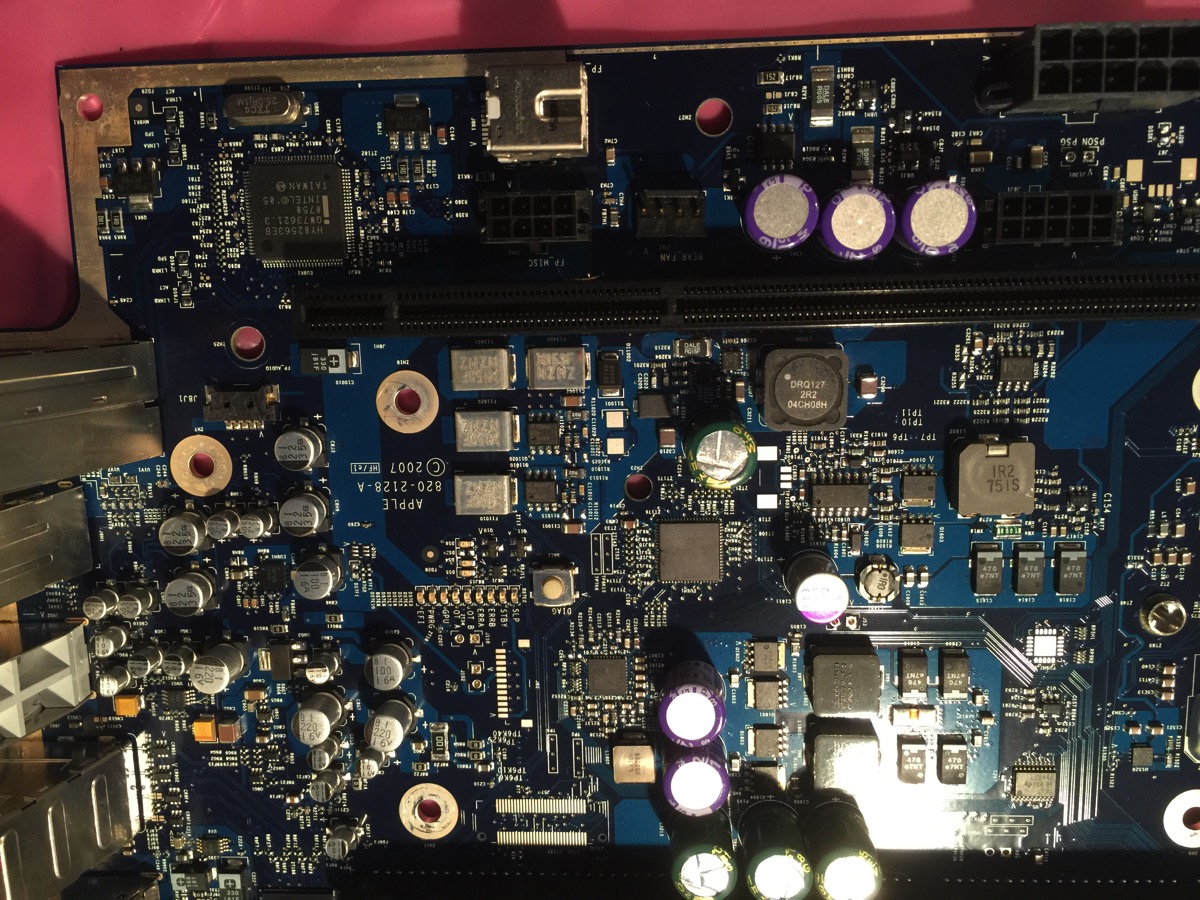
New motherboard in sealed wrap

Looks clean.

New board unwrapped

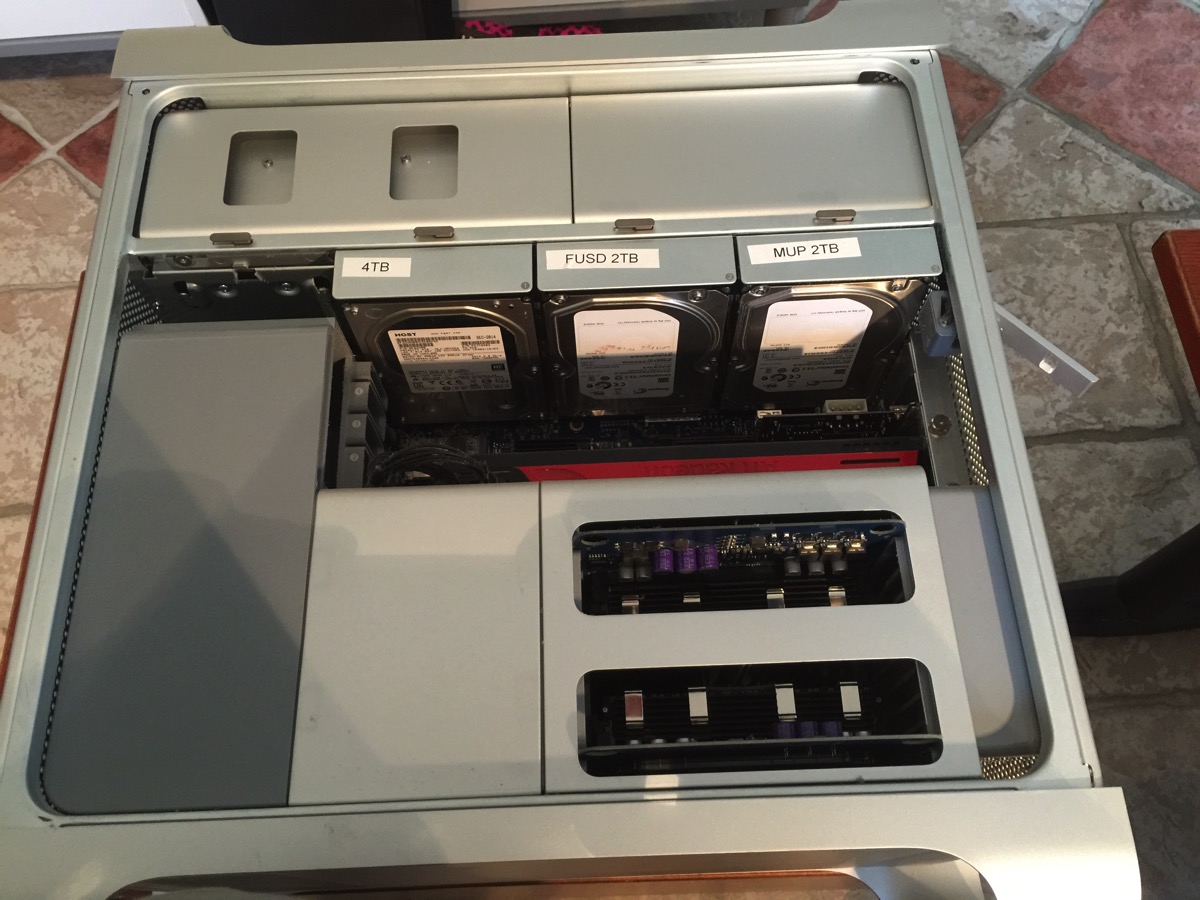
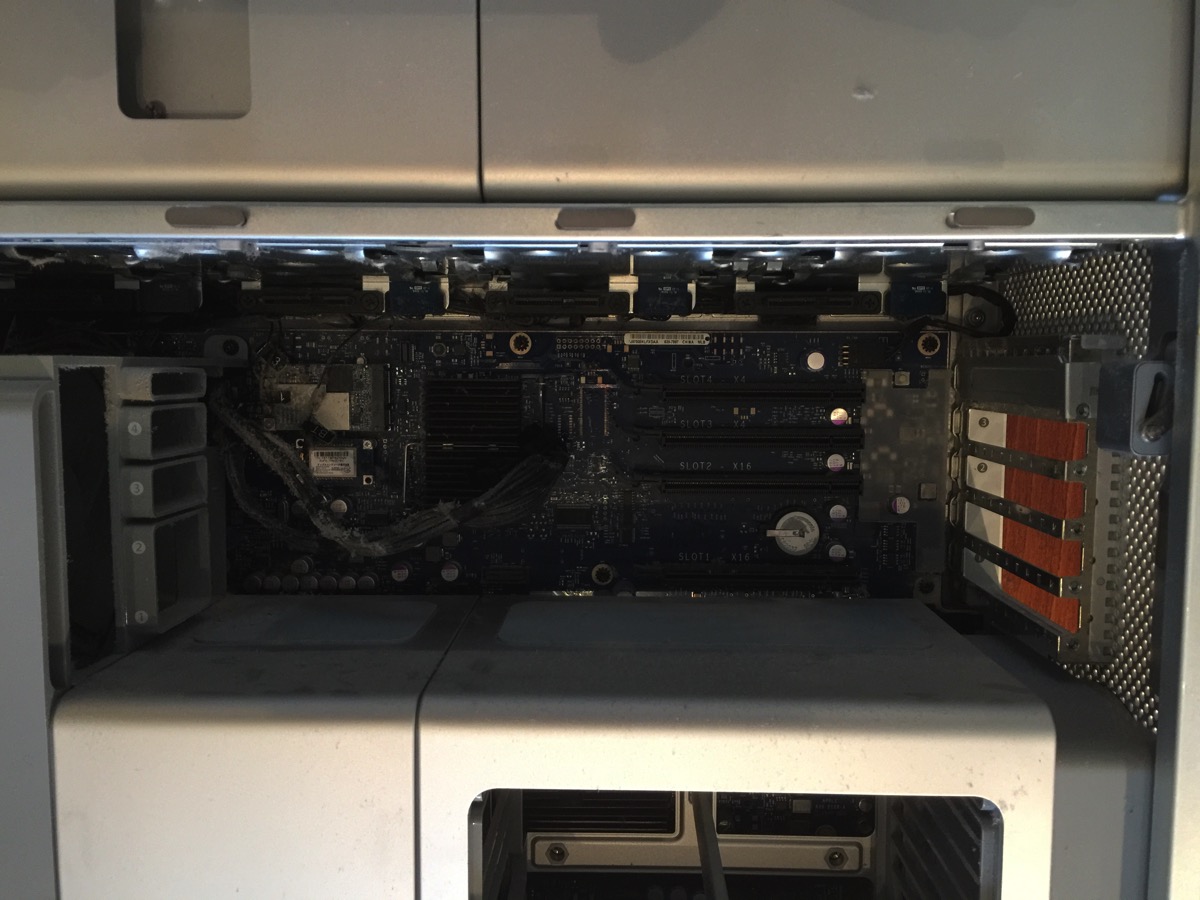
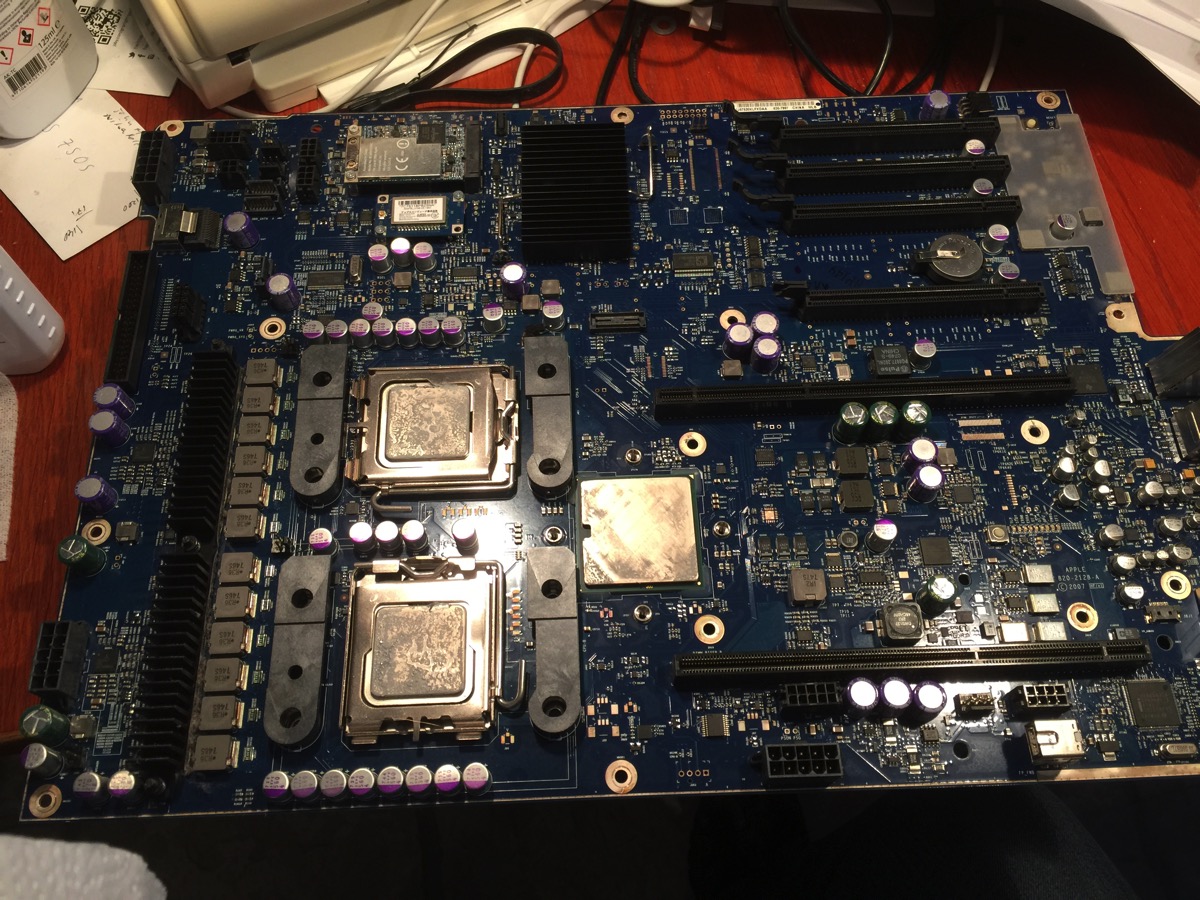
The machine before the slaughter. Note the unused (and unusable) bay 1. Bay 4 only serves for a slow drive with some old info. That slot is pretty slow in itself, hasn’t given any errors, but lots of huge delays (beach balling).

The machine before the slaughter

After removing the memory risers and the cards:

After removing memory and cards

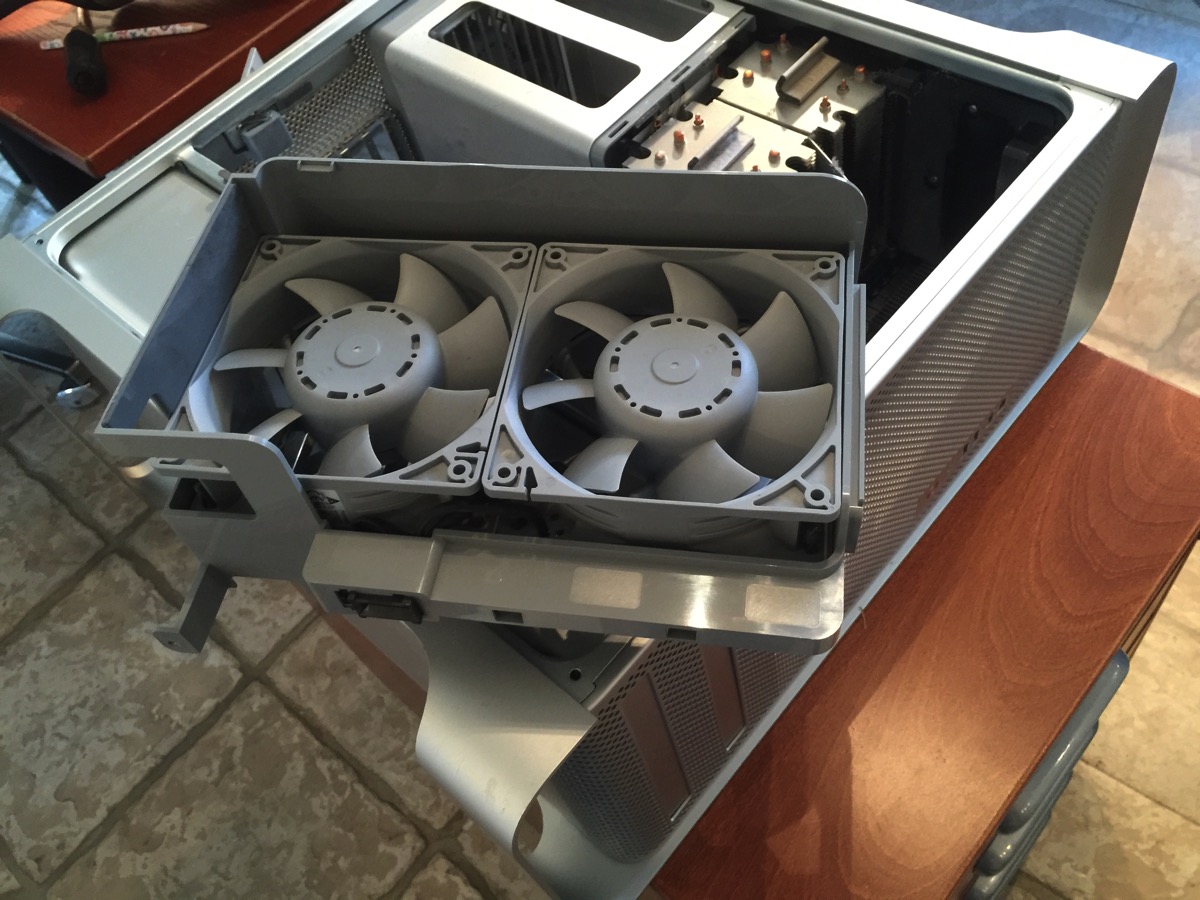
Out goes the front fan:

Front fan cage removed

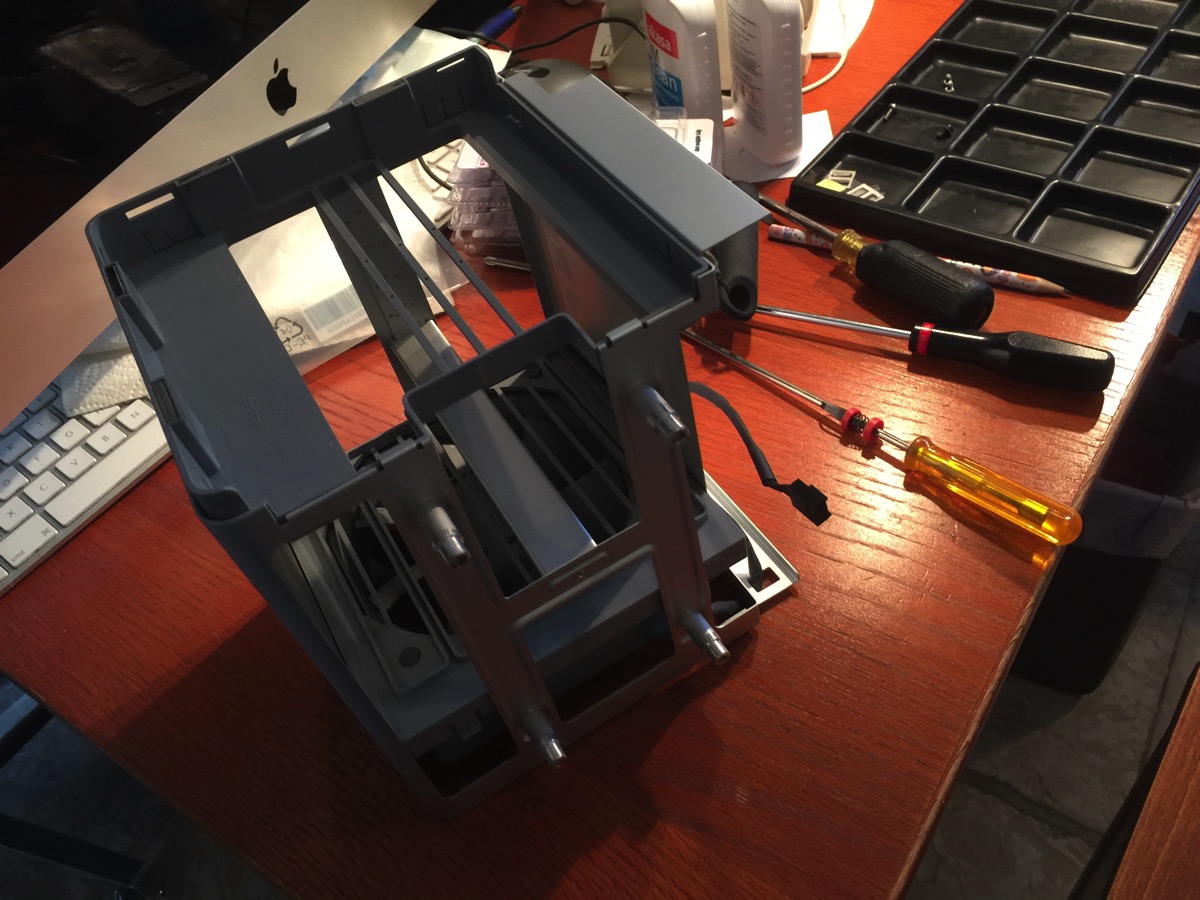
Then the turn comes to the memory cage. There’s a trick to this involving sliding the fan into the cage after releasing a few tabs. Read up on it carefully before attempting. iFixit has a good description.

Memory cage

Now it’s time to remove the three heat sinks. The two CPU sinks must be removed to get the main board out of the case, so you can just as well take the third sink (north bridge) as well.

Heat sinks

“Interestingly”, all the sinks are held in place by 3 mm in-hex screws. Three of these screws are right in between the three sinks so you need quite a long hexagonal screw driver to get them out. Luckily, the iFixit kit has both the right bit and an extender that was just long enough and narrow enough to get the job done. Most online sources say “flat screw driver”. Don’t believe them. It’s a hex you need.

Extender screwdriver with 3 mm hex bit.

The north bridge sink:

North bridge heat sink

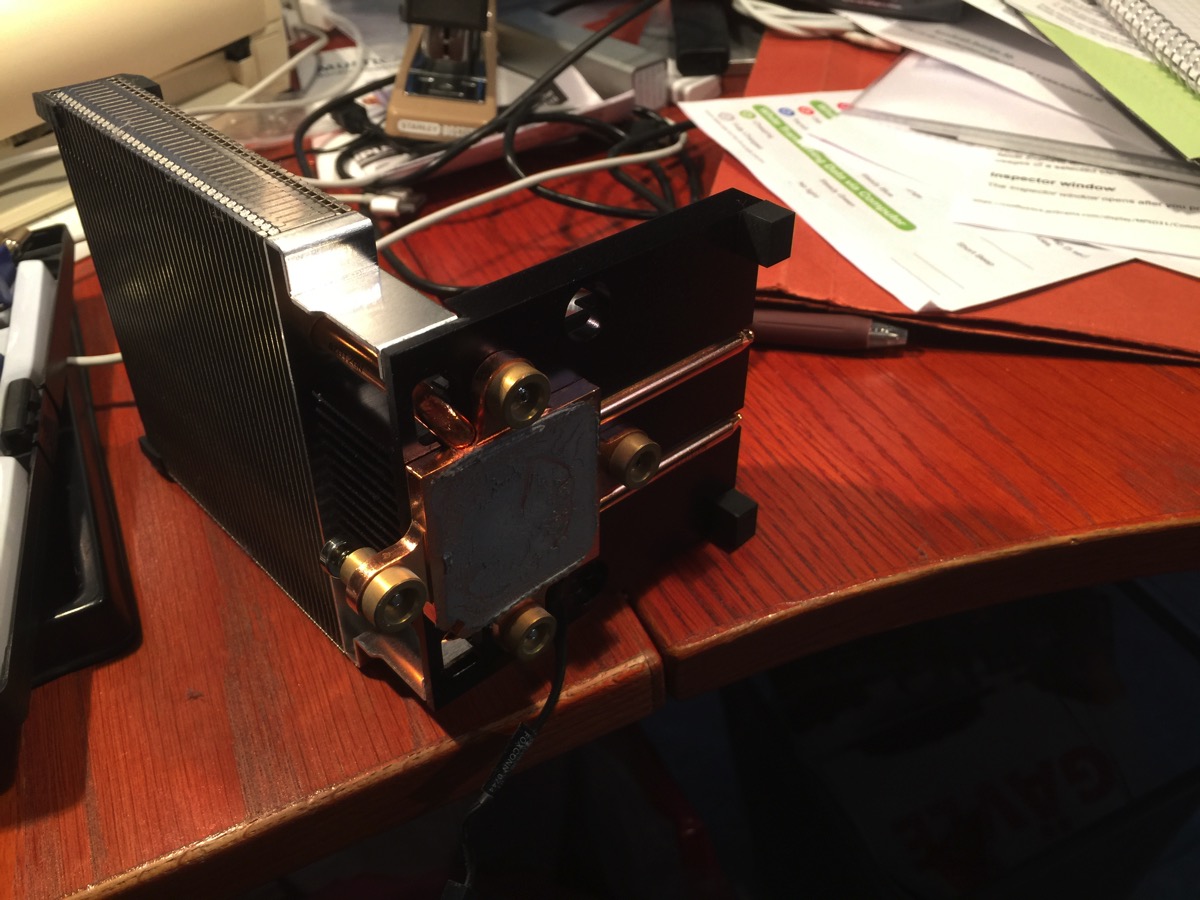
One of the CPU sinks:

Lower CPU sink (B)

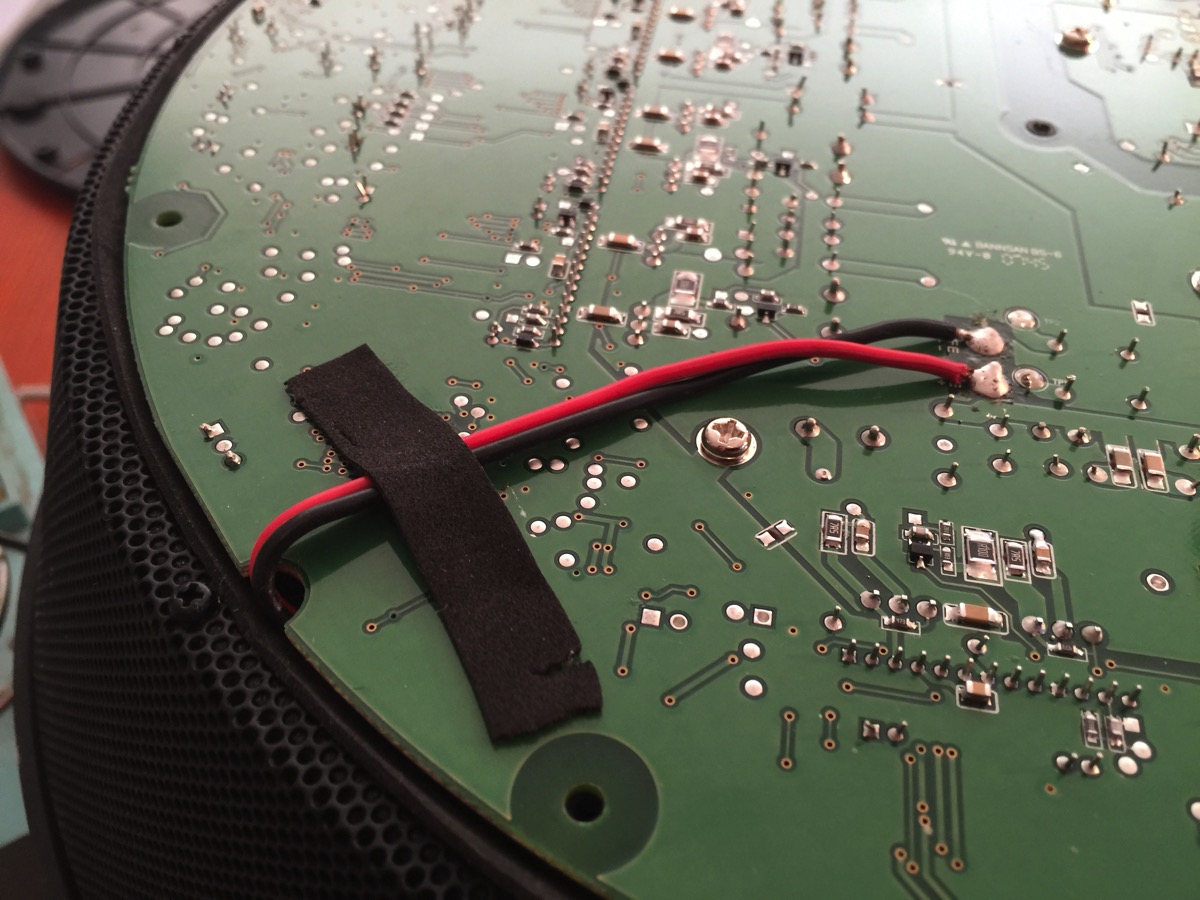
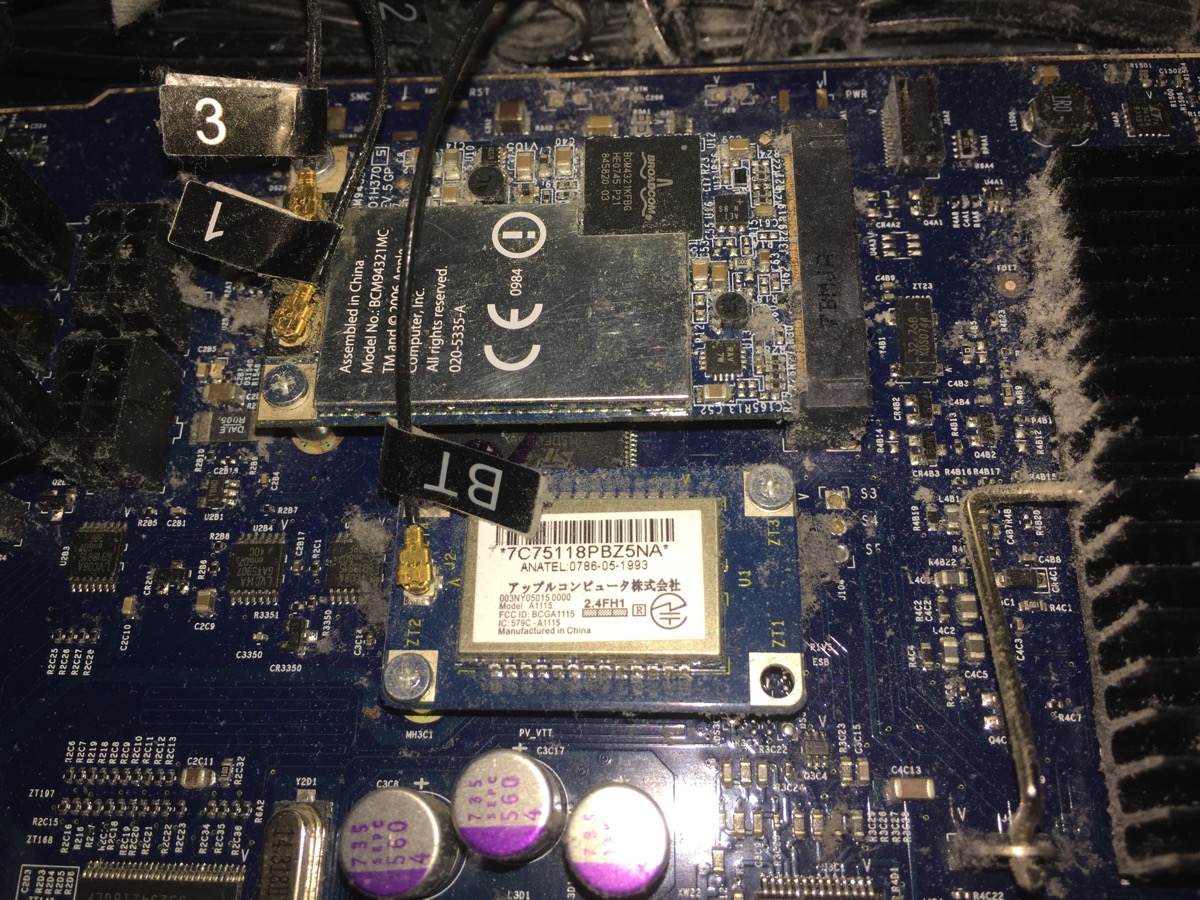
Time to disconnect the antennas. Do snap a pic first so you can look up which cable went exactly where. They’re nicely labeled, but there are no markings on the boards to correspond with the cable labels. Also, the antenna cable labeled “2” is over to the side somewhere and is not connected to anything. 

Airport and bluetooth boards

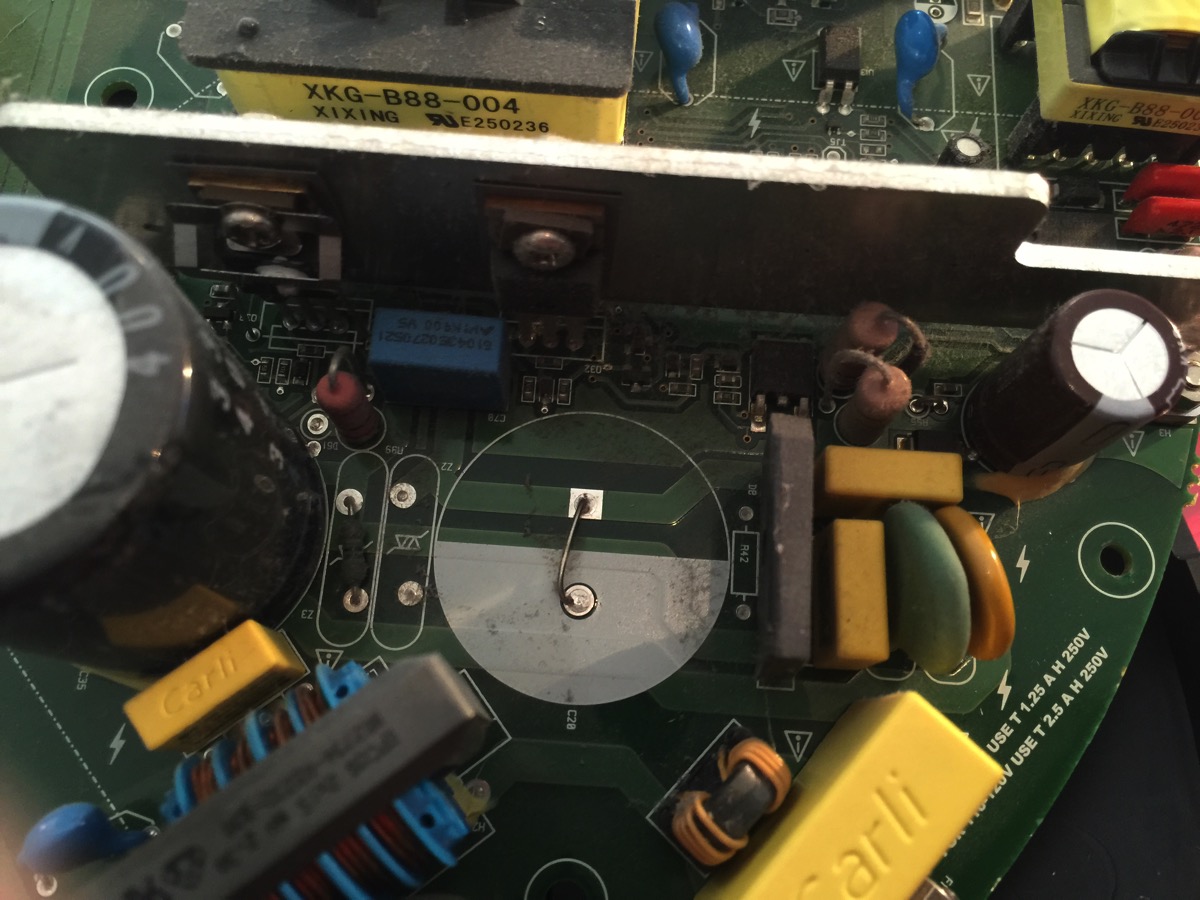
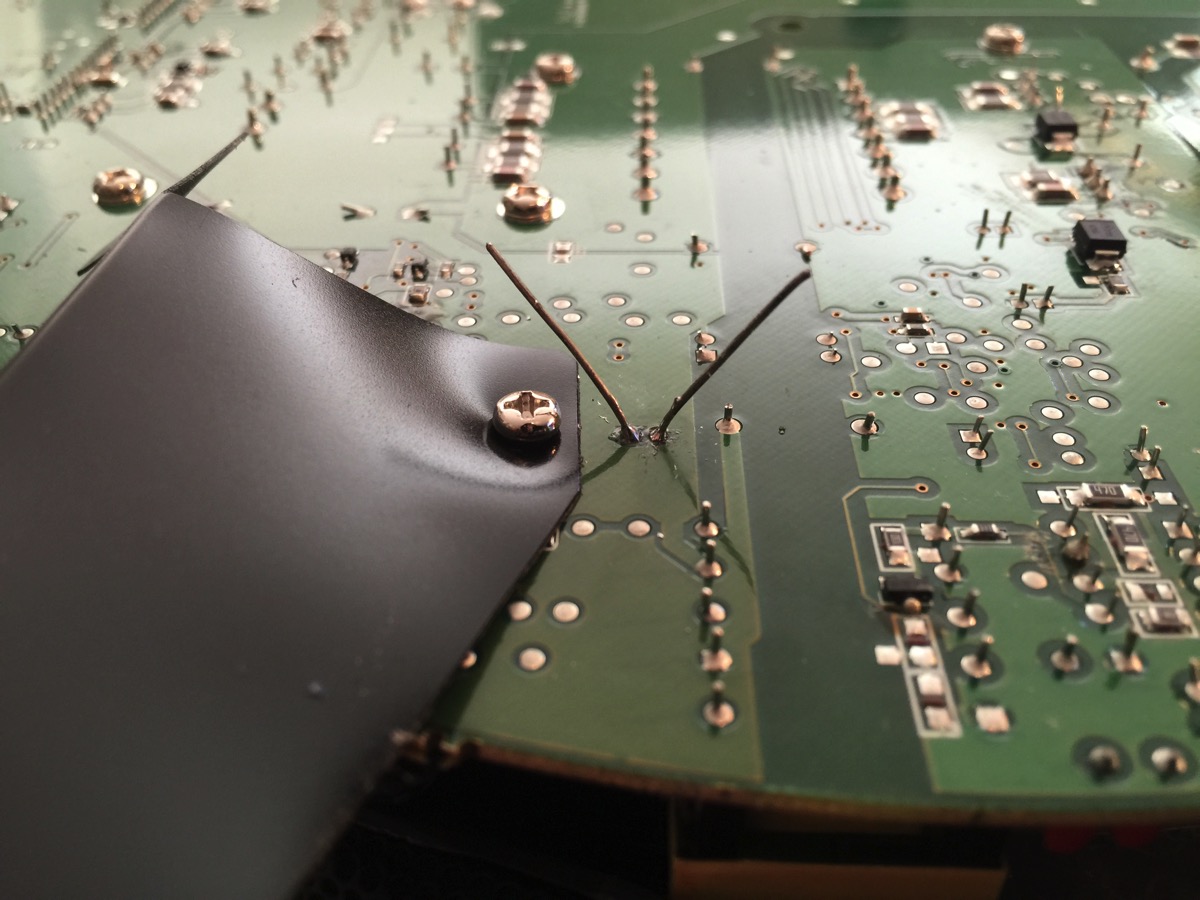
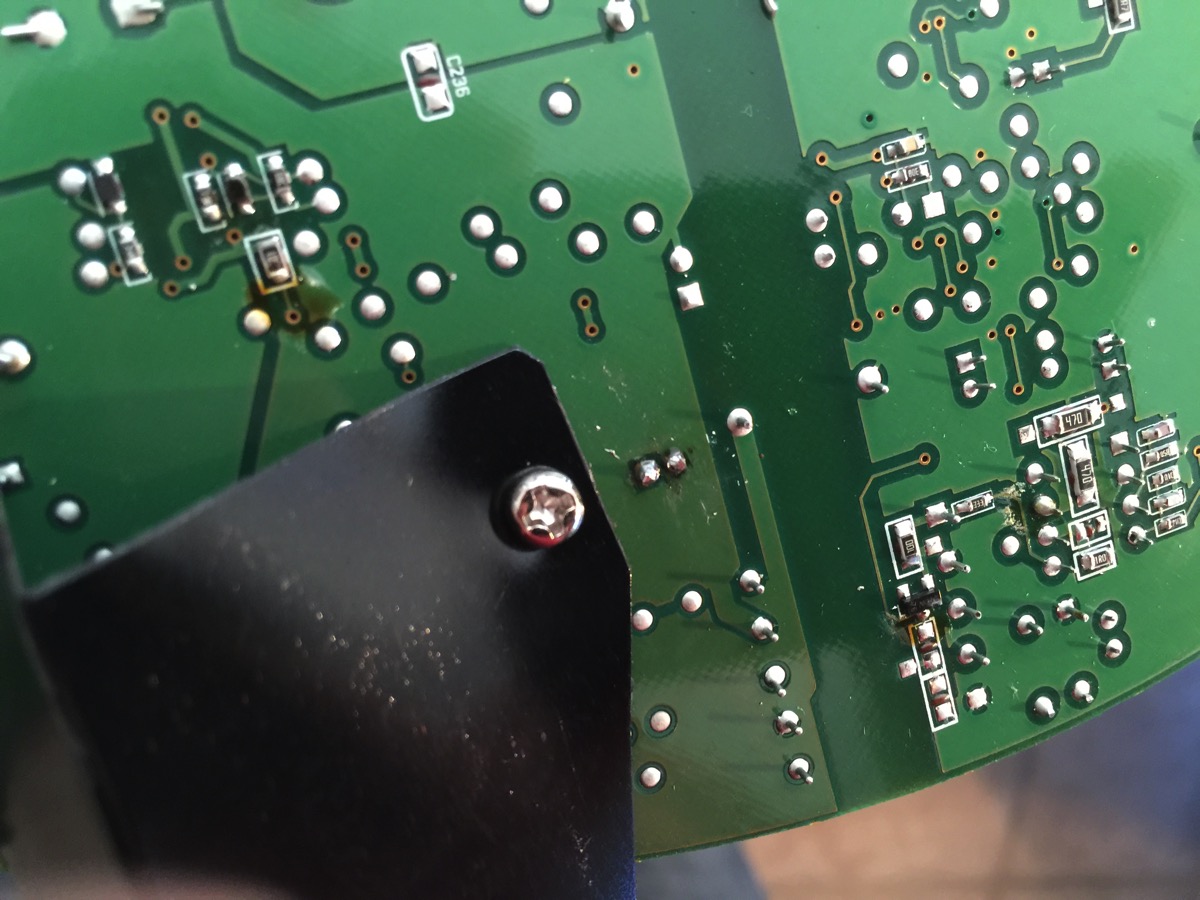
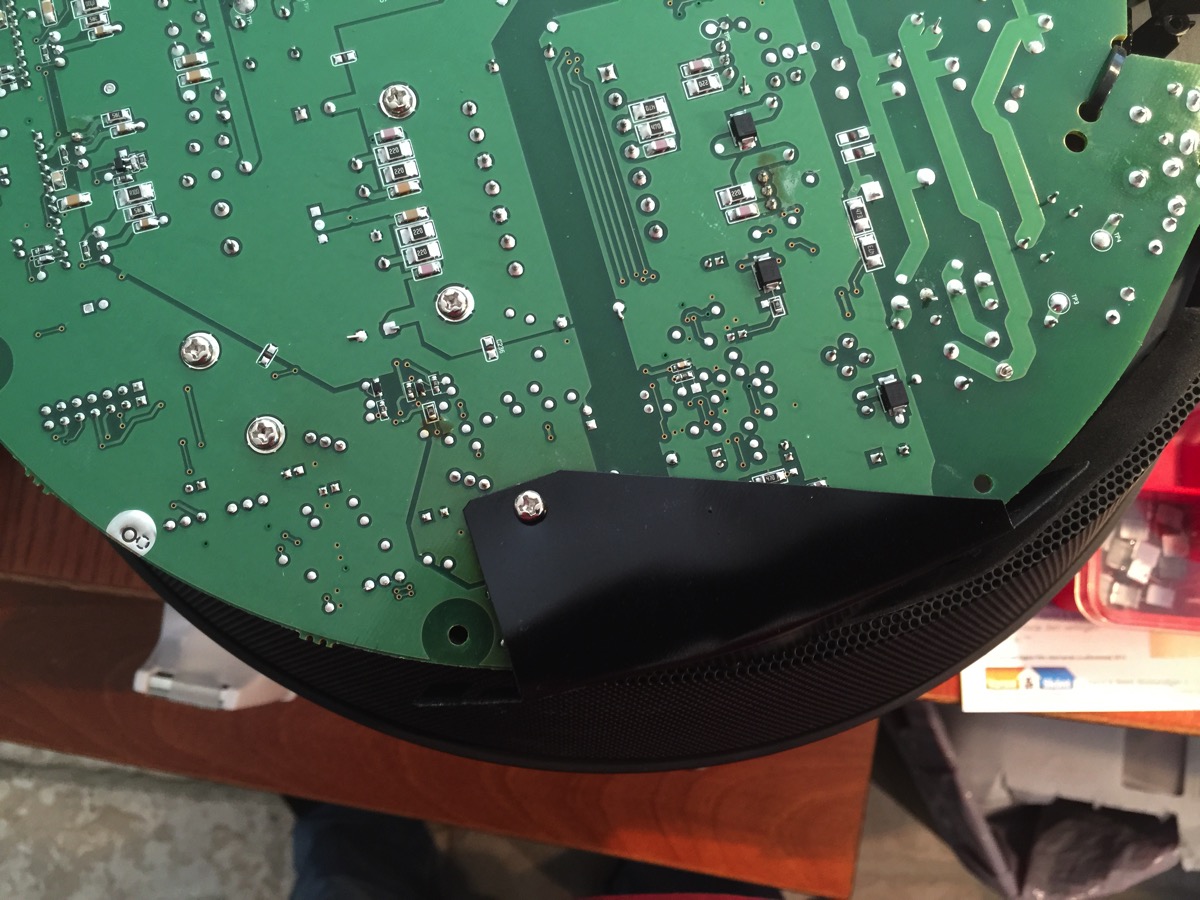
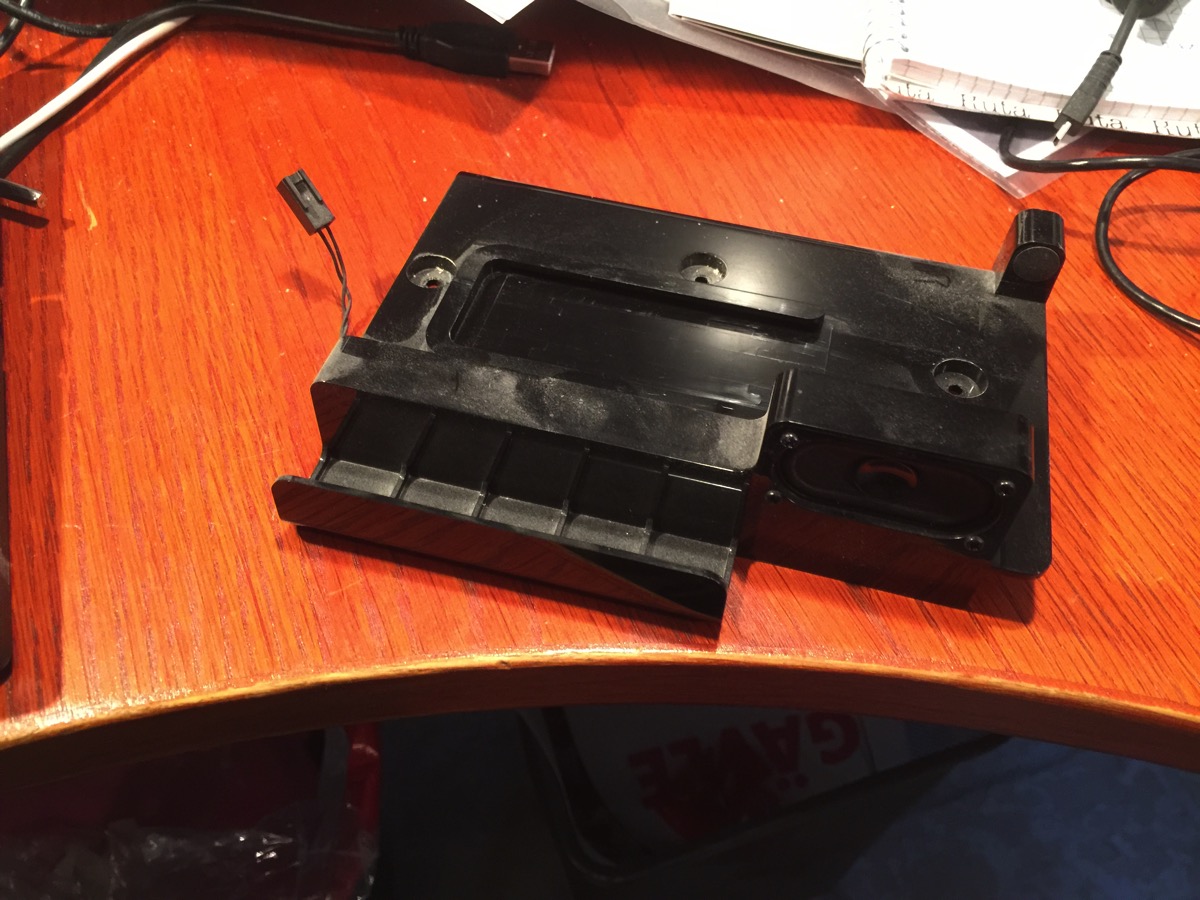
Now you have to take out the speaker assembly in the lower front of the case. There’s a screw holding the motherboard in place that you can’t get at otherwise. 

Speaker assembly

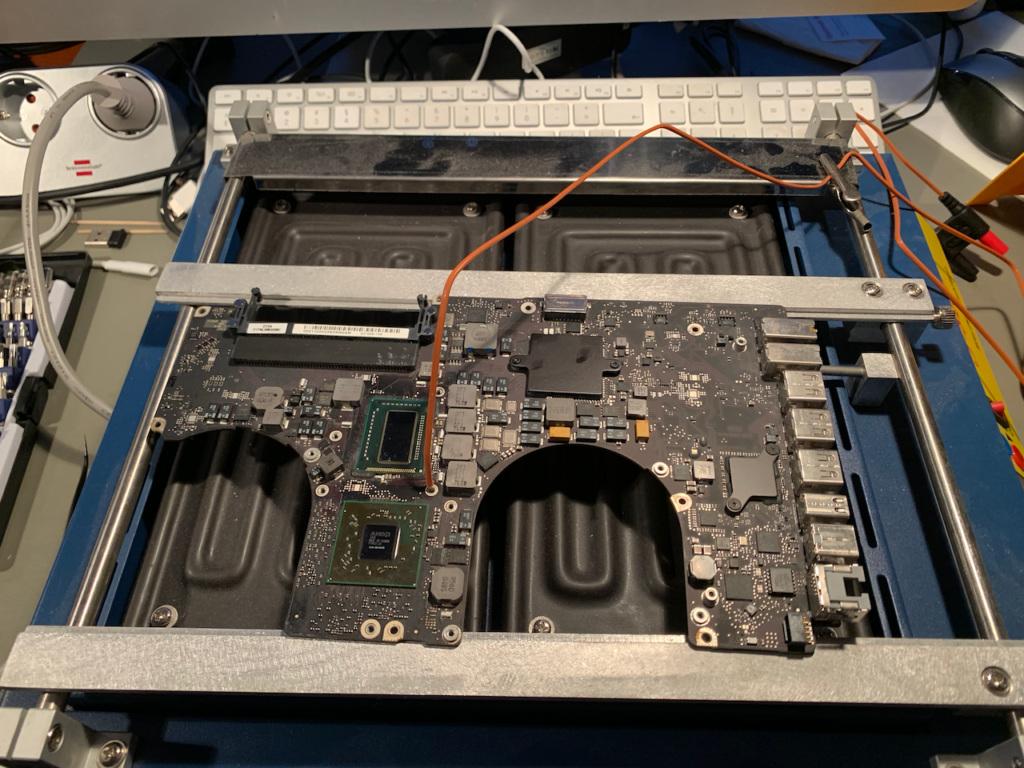
After disconnecting a truckload of connectors and carefully wiggling for a bit, out comes the old motherboard.

Old motherboard

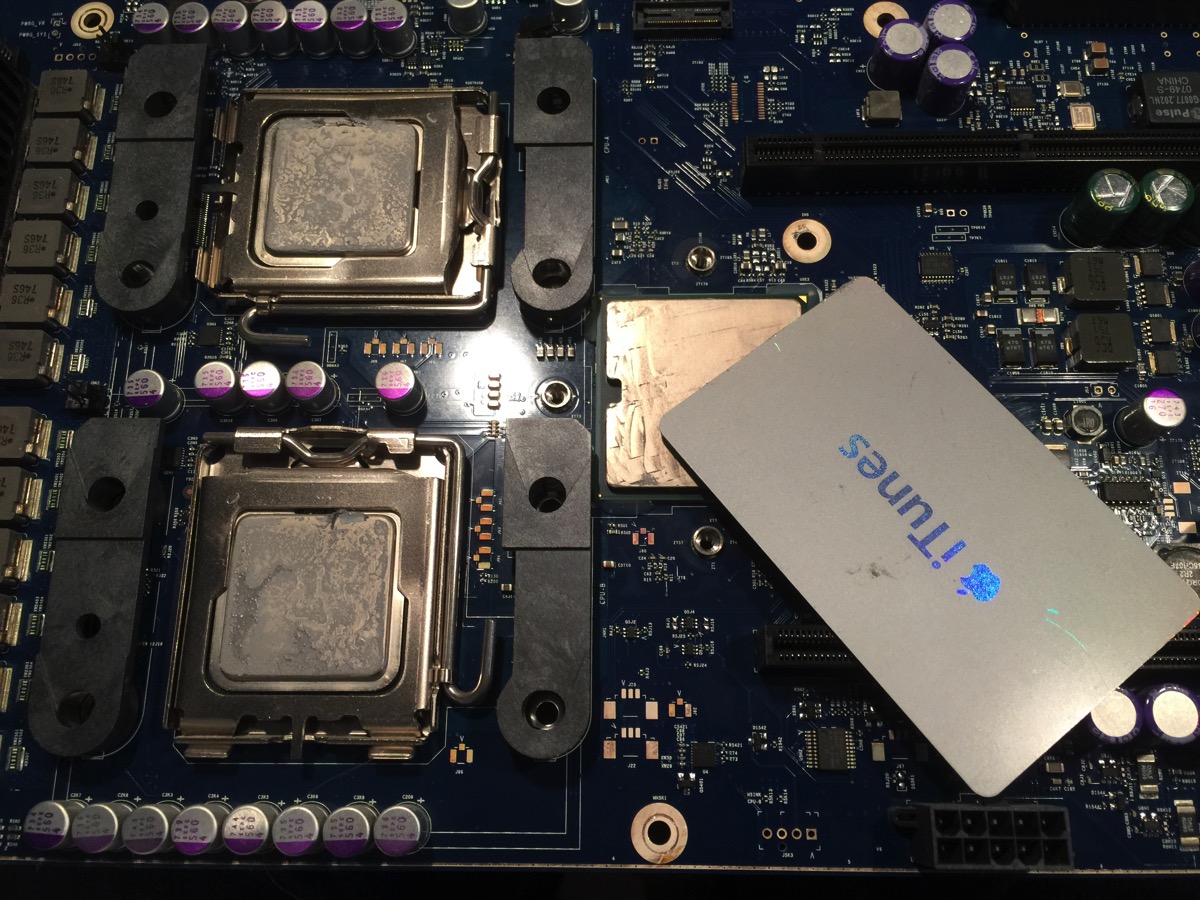
A good use for old iTunes cards: scraping thermal paste from the CPUs and the Northbridge. (The north bridge isn’t necessary, since this one is on its way out, but its a good trial run for the processors.)

Scraping paste

Use a decent cleaner and lint-free cloth to remove the rest of the old thermal paste after scraping it off with the plastic card.

Dissolvant

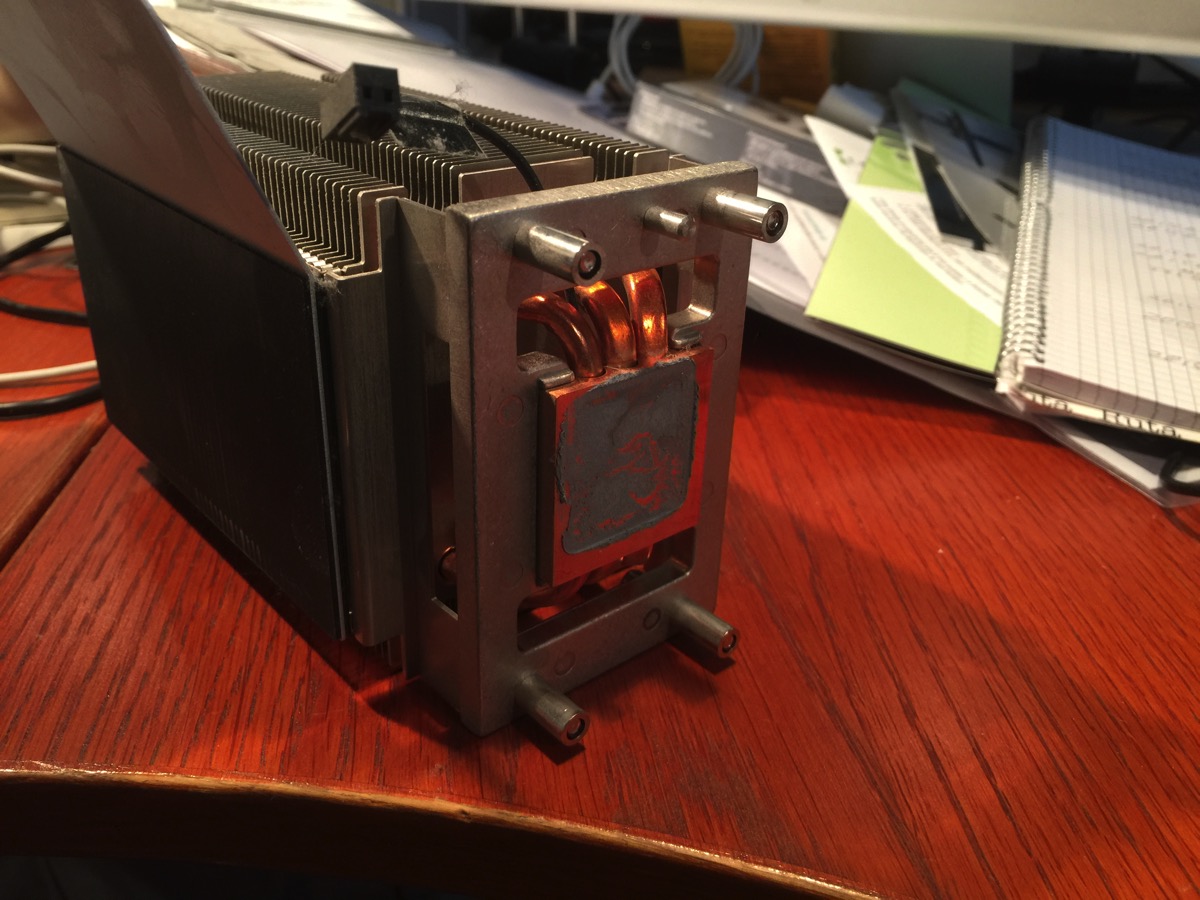
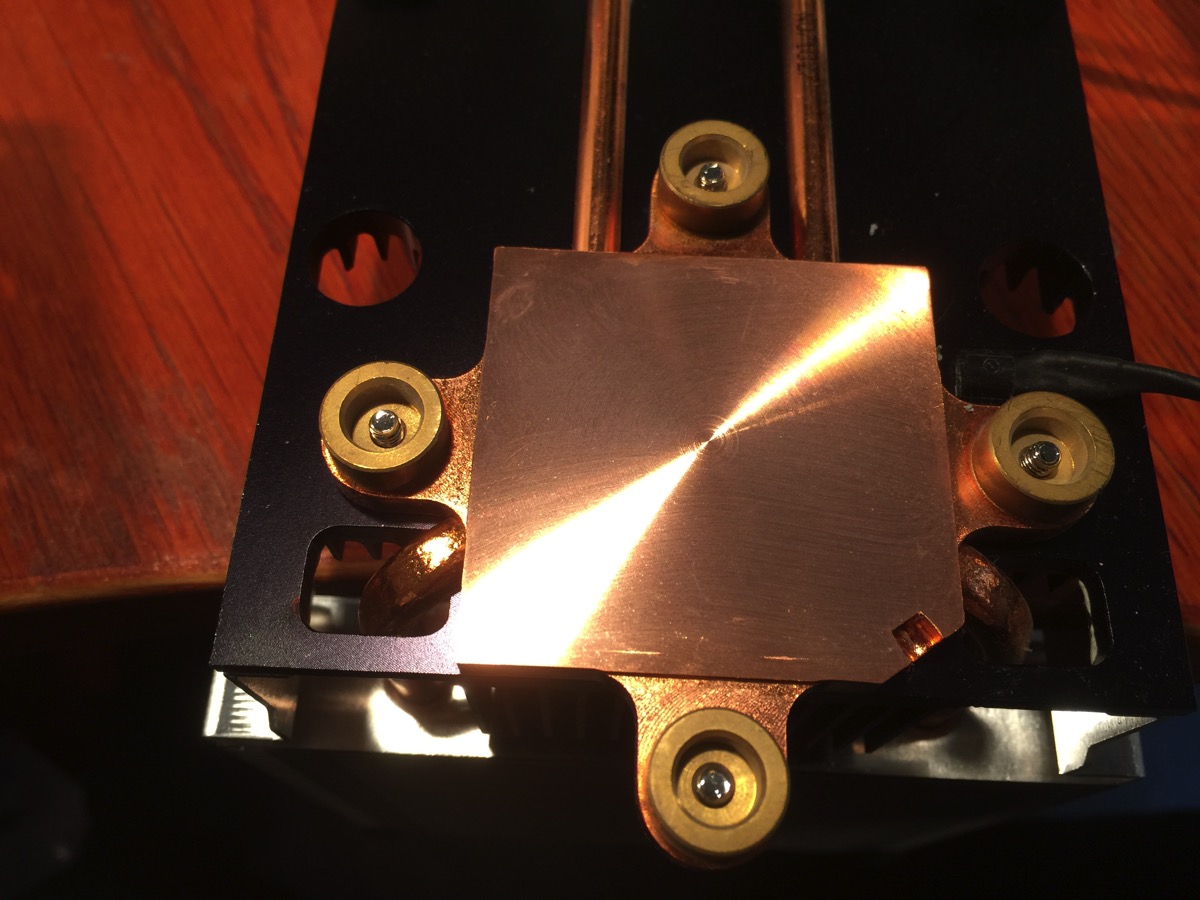
One of the sinks after cleaning. Looks great!

Clean sink

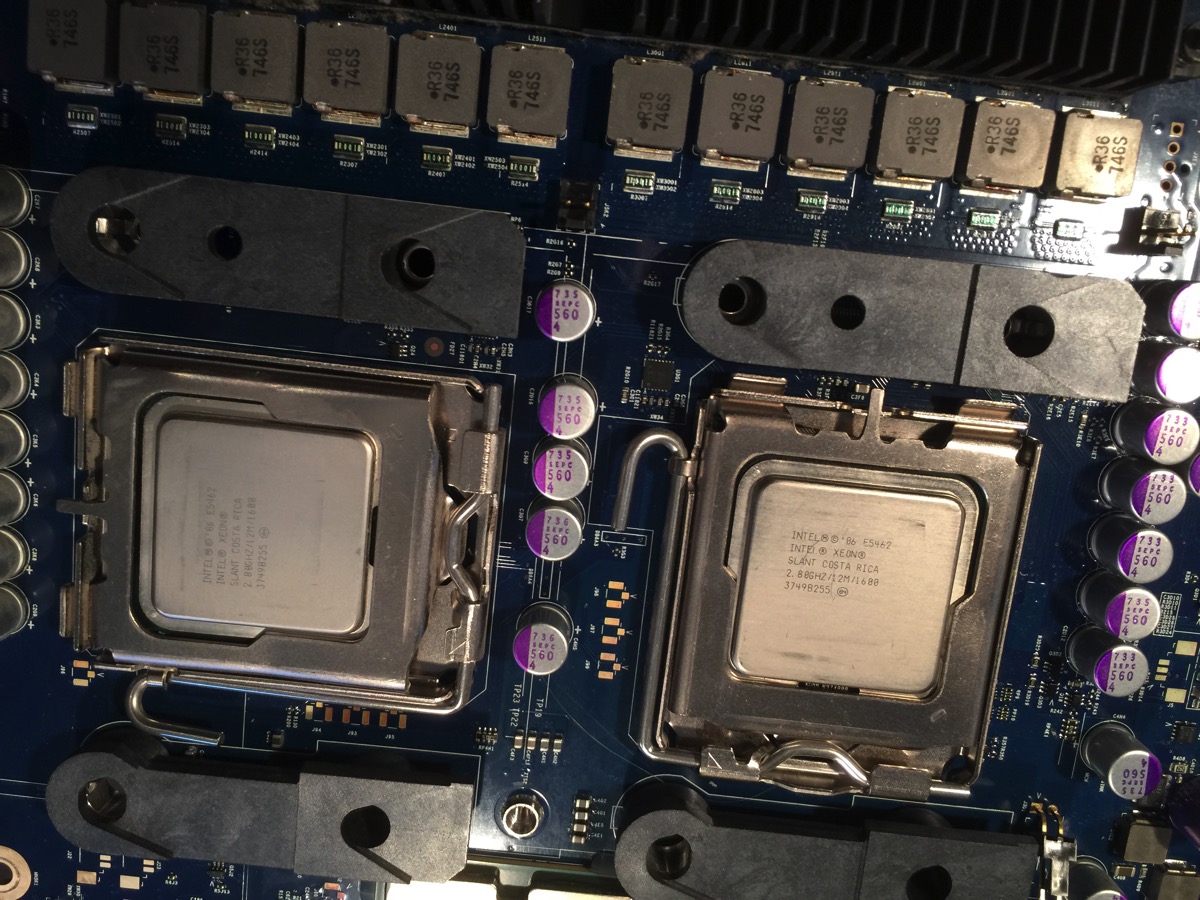
The processors look fine, too, after cleaning:

Clean processors

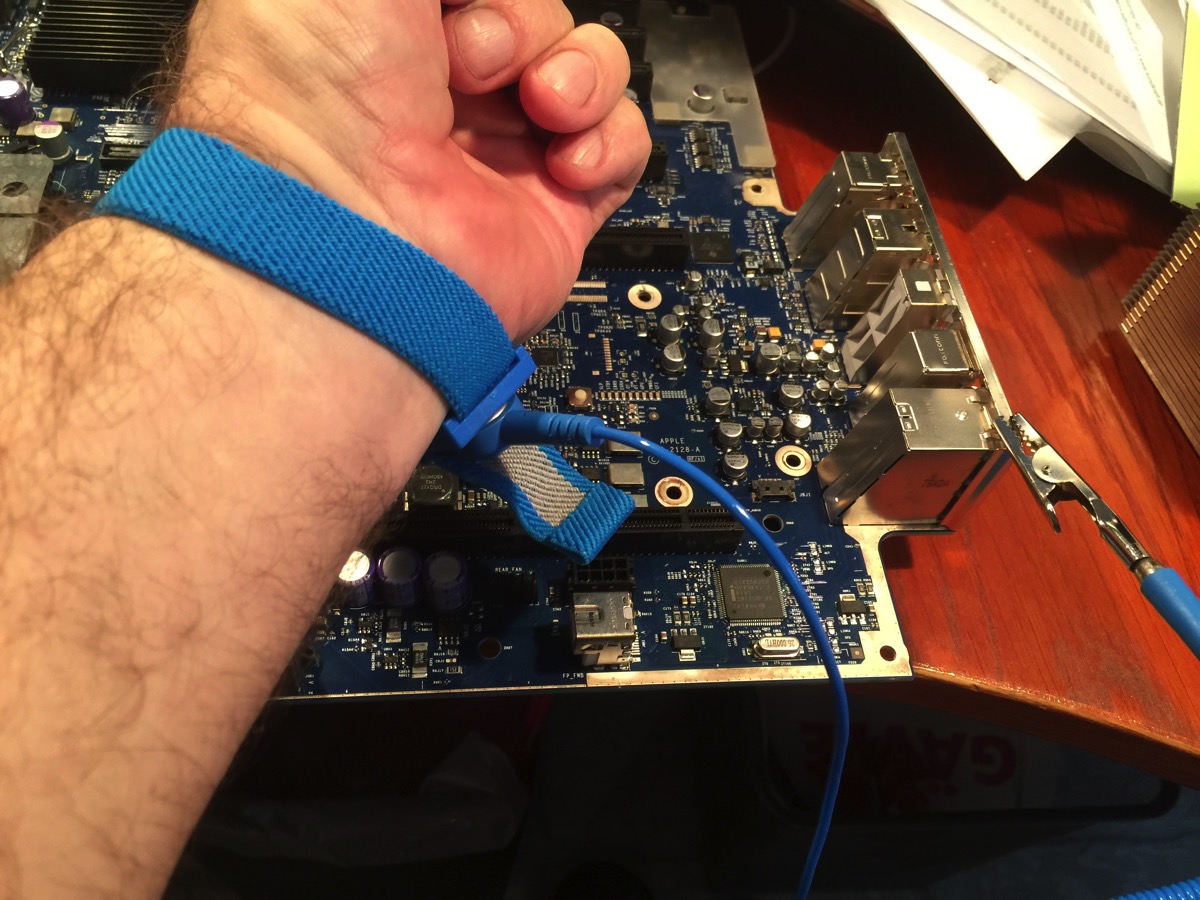
Time to strap up before removing the processors:

Antistatic strap

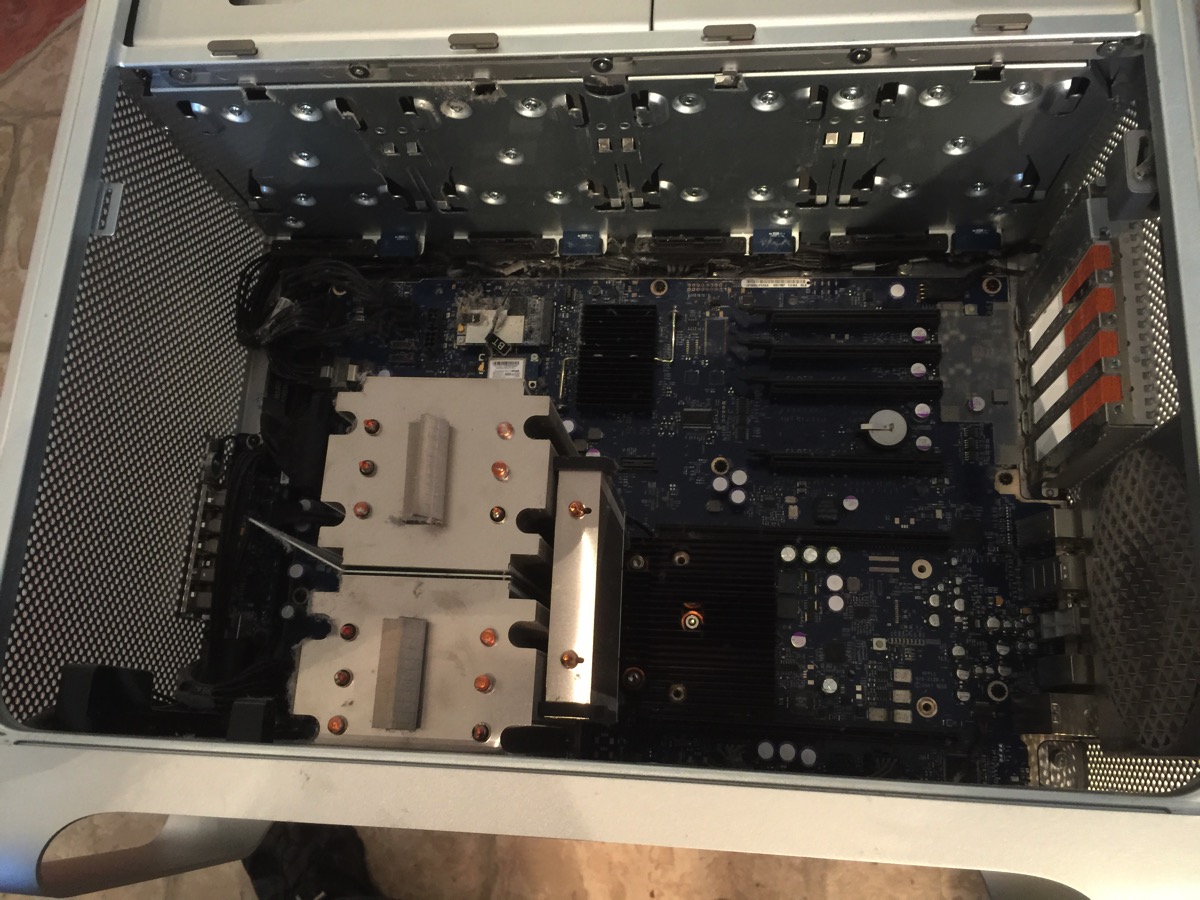
An empty case with a lot of loose cables:

Empty case

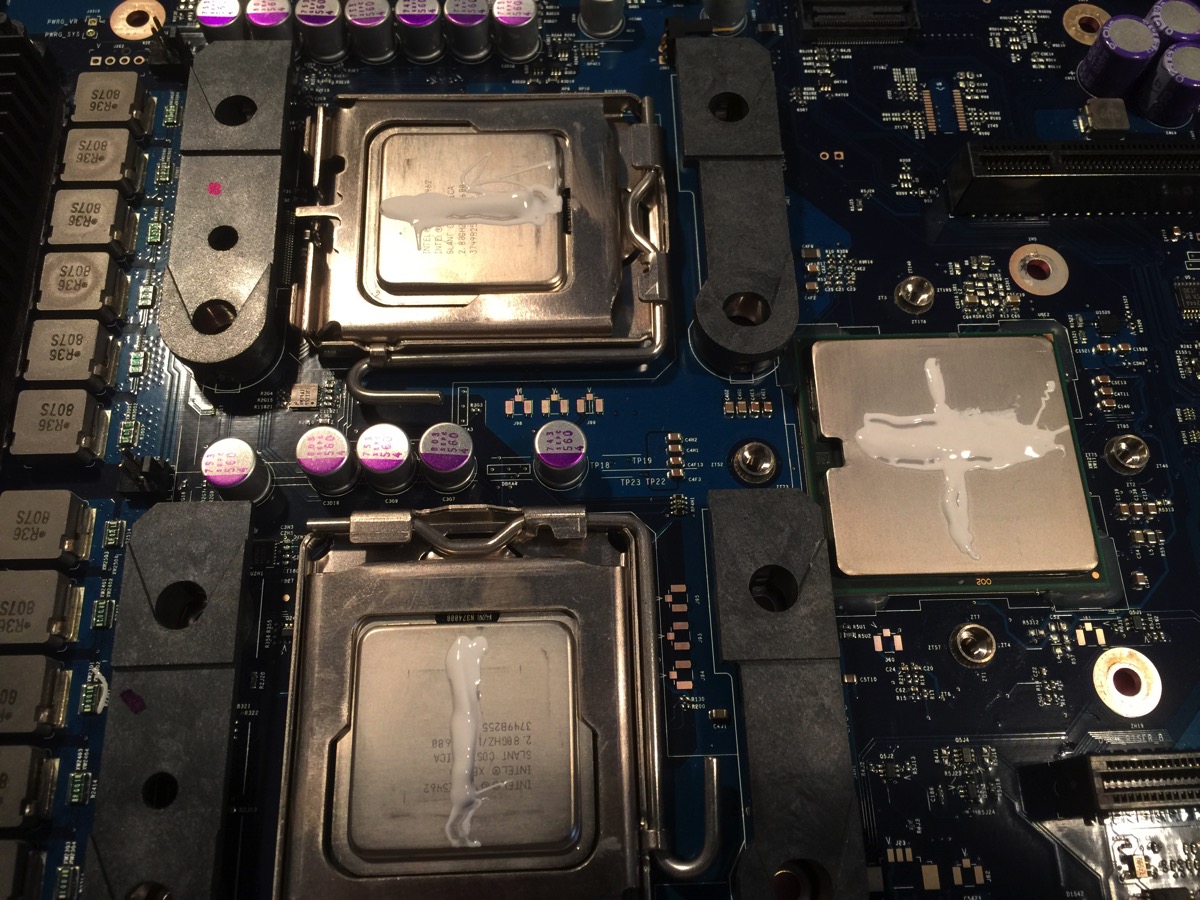
Putting thermal paste on the north bridge and the CPUs. I’m using the procedure recommended on the Arctic Silver site. Except I unintentionally modified it to be messier. With this procedure, very little paste goes on the sinks.

Past on chips

And then you put back the motherboard, the sinks and all the rest. And cross your fingers and boot. Oh, your machine now has a new serial number, but really, who cares?

I used the opportunity to blow away all the dust from all the parts using compressed and dried air. This machine has never been this clean before. 

Razer Mako click of death fix

I have the Razer Mako speakers on my desk. They consist of this heavy, huge amplifier/bass unit and two smaller round treble speakers. It’s a great sounding system, but a lot of them fall victim to the “click of death”. This is a failure mode where the speakers give a regular clicking or popping sound, about once a second, and no other sound comes out of them. As the system warms up, the popping disappears and they function fine again. Until the next time you switch them off and the misery starts over.

With these symptoms, I was pretty sure there must be a failed electrolyte capacitor in the power supply somewhere. The problem is knowing which one. Searching on the net after schematics for the Mako, I found a lengthy and interesting thread about this on the Australian Whirlpool forum (go figure…) where the solution is described very well. Someone, somewhere, figured out which capacitor fails, which makes the repair quite simple.

So, here’s what I did, in pictures. Disconnect the base unit from power, satellite speakers and the control pad.

DSC 0001

Turn it over. You’ll find 11 (I think) screws in the bottom plate. Remove them all. There’s one in the middle hidden by the label, you have to remember to remove that one, too.

DSC 0002

Lift off the bottom. The motherboard is connected to a switch in the upper case, in the picture that is in the upper right. To the left you see that it is held down by the red and black speaker cable. That’s the one we’ll remove so we’ll be able to turn the motherboard over. Heat the two pads with a soldering iron and remove the speaker cable.

DSC 0003

Turn the motherboard over. You can do that even with the power supply cables to the power switch in place. The electrolyte capacitor we’re looking for is marked “C125” and is the one with the red circle in my photo below. It’s a 47µF/25V capacitor. The negative lead is the one marked with dashes and is on the side away from the heatsink, i.e. pointing downwards in my photo.

IMG 2462

Turn the board over again (without twisting the power cables too much), loosen the screw holding the plastic shield in place, and twist the shield away about 90 degrees, since the C125 solder points are otherwise hidden by the shield. I’ve circled the C125 solder pads in the picture below.

IMG 2465

With a lot of patience, heat, solder suction, and solder wick, remove the old capacitor and clean out the solder holes. (Yes, I realize this isn’t always easy, especially since one of the pads is the ground plane and needs more than a little heat, but I can’t teach you to do this in a short few sentences.) Anyway, try not to destroy the circuit board by using too much heat for too long. Use only a suitable regulated soldering iron for this. If you do this right, the end result will look like this from above the board (the negative lead for the capacitor is marked as a filled in white field, downwards in the image). You can see daylight through the holes here.

IMG 2470

Seen from the solder side:

IMG 2468

I didn’t have any 47µF capacitors, but I did find a 100µF/40V capacitor in my old stock. It’s very important that the voltage rating is at least as high as the original (25V). I figured that a higher capacitance would be ok, within reasonable limits (turned out it was). If you have to buy a new capacitor, splurge on the absolut best and most expensive you can find. The cheapest cost around 5 cents, while the most expensive can be as much as 15 cents. I’m not kidding. Of course, it may cost you 20 bucks to get it shipped and invoiced, though.

IMG 2471

A curious aside: an entire huge capacitor is missing here, replaced by a short. Wonder what the story is behind that.

IMG 2473

The new capacitor was quite a bit bigger than the old, but that’s not really a problem. Make really, really sure the negative lead is in the right hole, away from the heatsink, i.e. to the left in this image.

IMG 2475

Ready to solder on the other side. (When flipping the motherboard around, always check that you don’t twist those power leads too much.)

IMG 2476

After soldering and cutting the excess leads, you should have a good connection with no solder bridges. Don’t use too much solder, just barely enough.

IMG 2478

Rotate the plastic shield back into position and tighten the screw holding it in place (there’s a nut on the opposite side of the motherboard that you may need to hold still to do that).

IMG 2479

Reattach the speaker leads.

IMG 2481

All that remains is to put back the bottom plate and all the screws. There’s a really good chance your system will work fine, now. Mine did, with one exception: when switching on from standby, there’s a single sharp click from the speakers. I’m guessing it’s caused by my capacitor having an excessive value (100µF instead of the original 47µF). We’ll see if this turns out to be a problem or not.

Powering up your ReadyNAS NV+ remotely

I have two ReadyNAS NV+ units from Netgear and I’ve put them in a backroom where nobody normally goes. I don’t either. Now, for extra security in case of fire or a break-in, I’m actually moving them to a neighbor’s spare room, which means I can’t easily get at them anymore and the energy consumption could become a problem. As could the constant whining, but I don’t think so.

The problem with the ReadyNAS is that even though you can power them down through their config pages using a browser, there is no way to switch them on again short of actually, physically, walking over there and pressing the blue button. There’s no wake-on-lan or any other similar provision. The only alternative is to have it power on and off according to a schedule, which is what I have done so far. But if you do that, that schedule will be unnecessarily liberal, just in case you need access to the units. I’m mainly using them for Retrospect backups and disk images when doing recovery, and very little else, so I don’t even use them every day. I calculated that the 16 hours a day these two boxes are running, costs me around 900 kWh per year. That’s around $150 in electricity per year. And it’s ecologically rude, too.

Continue reading “Powering up your ReadyNAS NV+ remotely”

Merging mice

I’ve got this Wacom Intuos 3 tablet and I like it. The mouse, in particular, is very nice. Good feeling. As long as it works. The problem I’ve had is that my first mouse started to give switch bounce on the left button, and a problem with the scroll wheel, after about 16 months. Out of warranty, of course. So I ordered a new one for around $40. That one lasted eight months before it succumbed to switch bounce, but this time it was the right button. The distributor just sent me a replacement for free, and didn’t ask for the defective one in return. So I ended up with one good and two bad Wacom mice. Since I’m pretty sure the new one won’t last more than a year, or max two, it seemed prudent to start assembling a fully working spare from the two failed mice. That’s what this picture story is about.

Continue reading “Merging mice”