Another couple of years?

My Mac Pro is an early 2008. Over the last few years, it’s been losing function by parts. It’s like chip rot. First the firewire didn’t work right, lots of transfer errors. It may even have been that way from the start, but I always thought it was the LaCie drives or firewire hubs that screwed things up. So I stopped using firewire entirely.

Then the RAID gave me trouble, which turned out to be disk bay 1 being flaky. With or without the RAID card, bay 1 would give me disk errors even after replacing the disk. The bad disks worked fine in other bays, though.

The last couple of months, the machine started beach balling a lot, getting so slow I would almost scream. Dragging selections in Muse could take ten or twenty seconds to do, while they were instantaneous on my Macbook Pro. USB started to be flaky about a year back, with bad sound quality and dropouts using a USB headset. A few years back the upper DVD reader stopped working, too.

After a couple of months, I reinstalled OS X to no effect. Running TechTool Pro and Diskwarrior on the disk had shown no significant errors, but it took forever. Very slow disk reading. I then moved my system disk from bay 4 to bay 3, and the beach balling went away immediately. So now I was down to two functioning disk bays.

I’ve been eyeing the new Mac Pro, but the lack of serious disk space keeps me from going for it. And the price, of course. Decent alternatives would be a second hand 2010 or 2012 model. Or, I figured, trying to fix my 2008. The only thing I could think of as being the cause would be the disk cable harness (unlikely), the motherboard, or the power supply. You have to start somewhere, so I figured a new motherboard would be a good thing to do. Turns out you can get them for a decent price nowadays. I found a vendor on eBay that has a stack of them for $165, and they claim they’ve been tested before shipping. So I bought one, and got it less than a week later.

Today, I switched motherboards. It’s a pretty invasive thing to do to your Mac Pro, but you can do it in two or three hours without rushing it. Nothing broke, and I’m writing this post on that machine a few hours later and everything seems to work. I’ve moved the system drive to bay 4 and the machine remains snappy. No beach balling. I’ve installed a 4 TB in the previously really bad bay 1, and it seems to work normally. I’m having a glimmer of a hope this machine will work fine for another year or two, or maybe more. At least until Apple releases a decent modern replacement (if ever…). Below you’ll find a few pics of the process.

The new board arrived completely intact and well packaged in a sealed antistatic bag.

New motherboard in sealed wrap

Looks clean.

New board unwrapped

The machine before the slaughter. Note the unused (and unusable) bay 1. Bay 4 only serves for a slow drive with some old info. That slot is pretty slow in itself, hasn’t given any errors, but lots of huge delays (beach balling).

The machine before the slaughter

After removing the memory risers and the cards:

After removing memory and cards

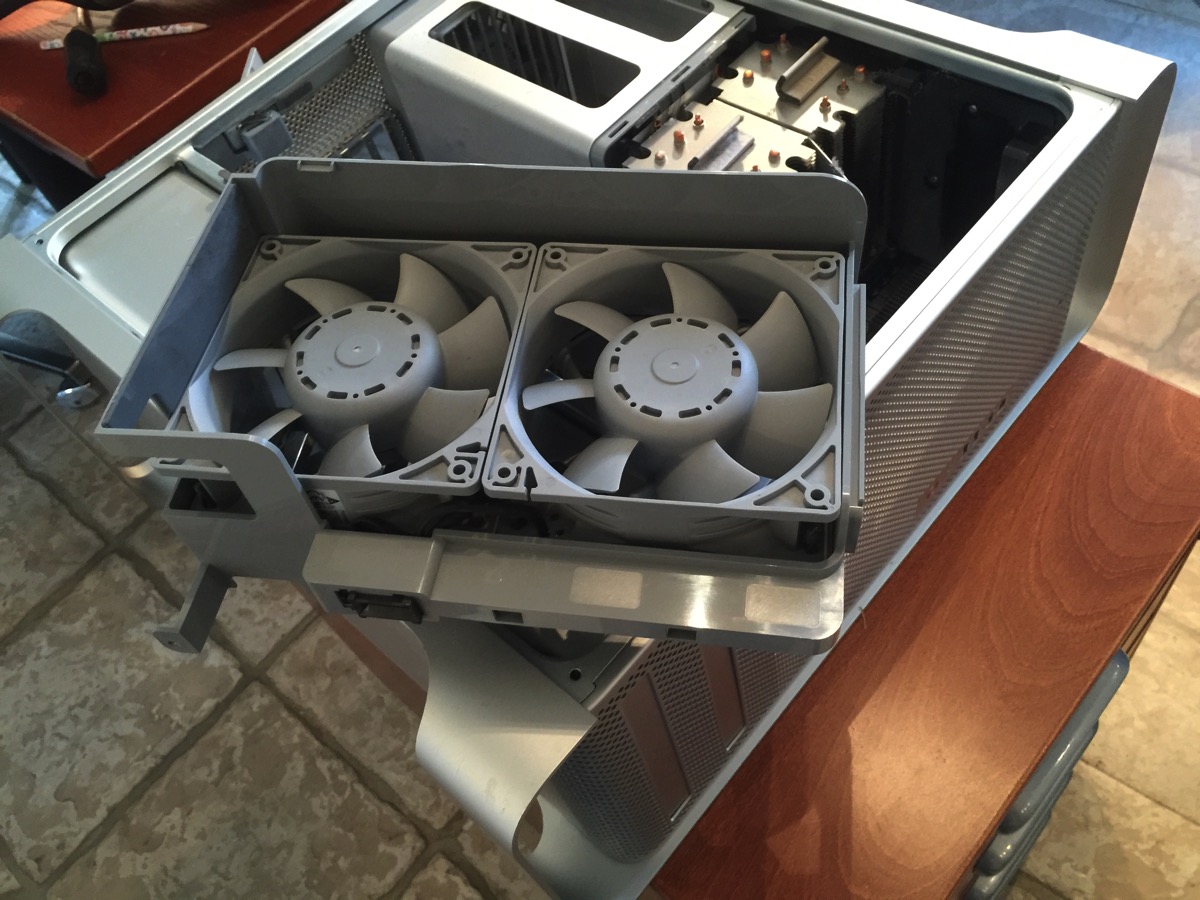
Out goes the front fan:

Front fan cage removed

Then the turn comes to the memory cage. There’s a trick to this involving sliding the fan into the cage after releasing a few tabs. Read up on it carefully before attempting. iFixit has a good description.

Memory cage

Now it’s time to remove the three heat sinks. The two CPU sinks must be removed to get the main board out of the case, so you can just as well take the third sink (north bridge) as well.

Heat sinks

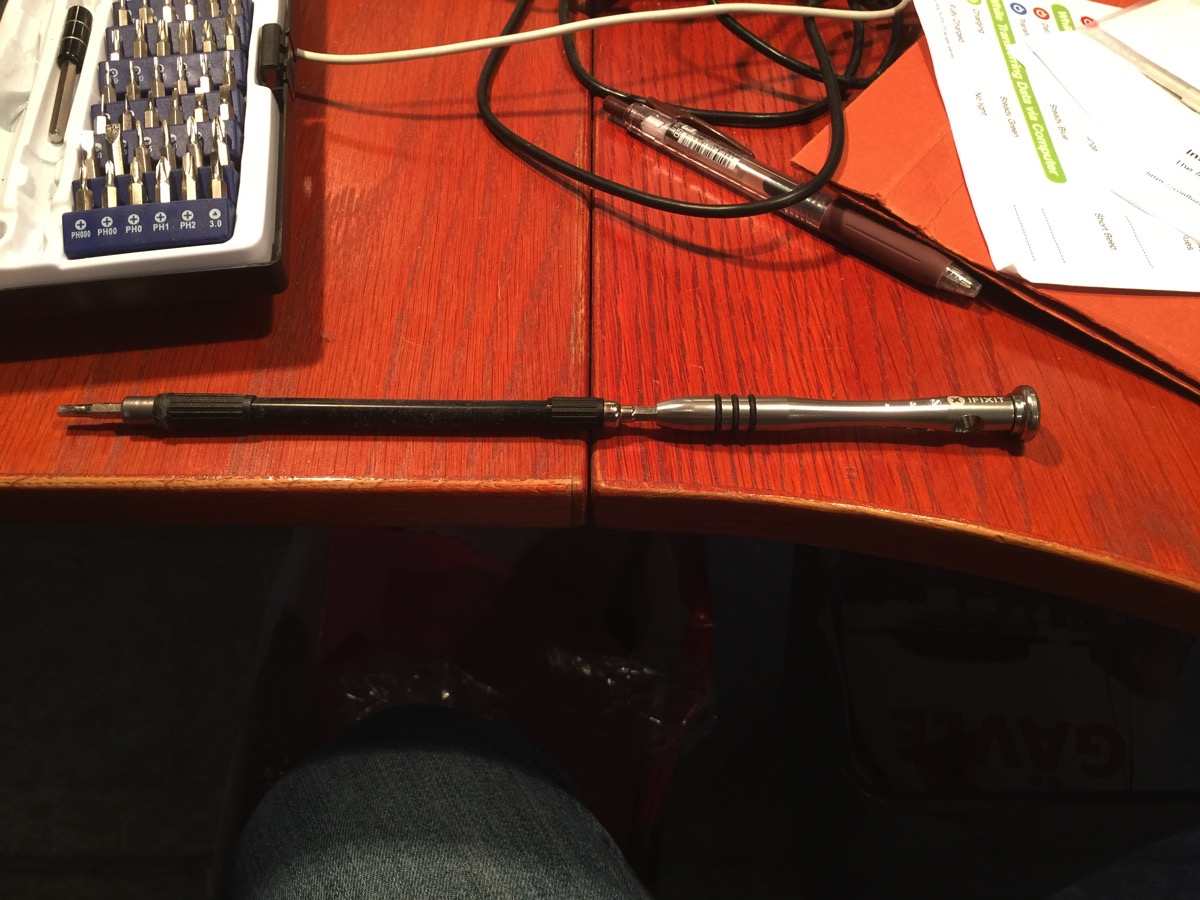
“Interestingly”, all the sinks are held in place by 3 mm in-hex screws. Three of these screws are right in between the three sinks so you need quite a long hexagonal screw driver to get them out. Luckily, the iFixit kit has both the right bit and an extender that was just long enough and narrow enough to get the job done. Most online sources say “flat screw driver”. Don’t believe them. It’s a hex you need.

Extender screwdriver with 3 mm hex bit.

The north bridge sink:

North bridge heat sink

One of the CPU sinks:

Lower CPU sink (B)

Time to disconnect the antennas. Do snap a pic first so you can look up which cable went exactly where. They’re nicely labeled, but there are no markings on the boards to correspond with the cable labels. Also, the antenna cable labeled “2” is over to the side somewhere and is not connected to anything. 

Airport and bluetooth boards

Now you have to take out the speaker assembly in the lower front of the case. There’s a screw holding the motherboard in place that you can’t get at otherwise. 

Speaker assembly

After disconnecting a truckload of connectors and carefully wiggling for a bit, out comes the old motherboard.

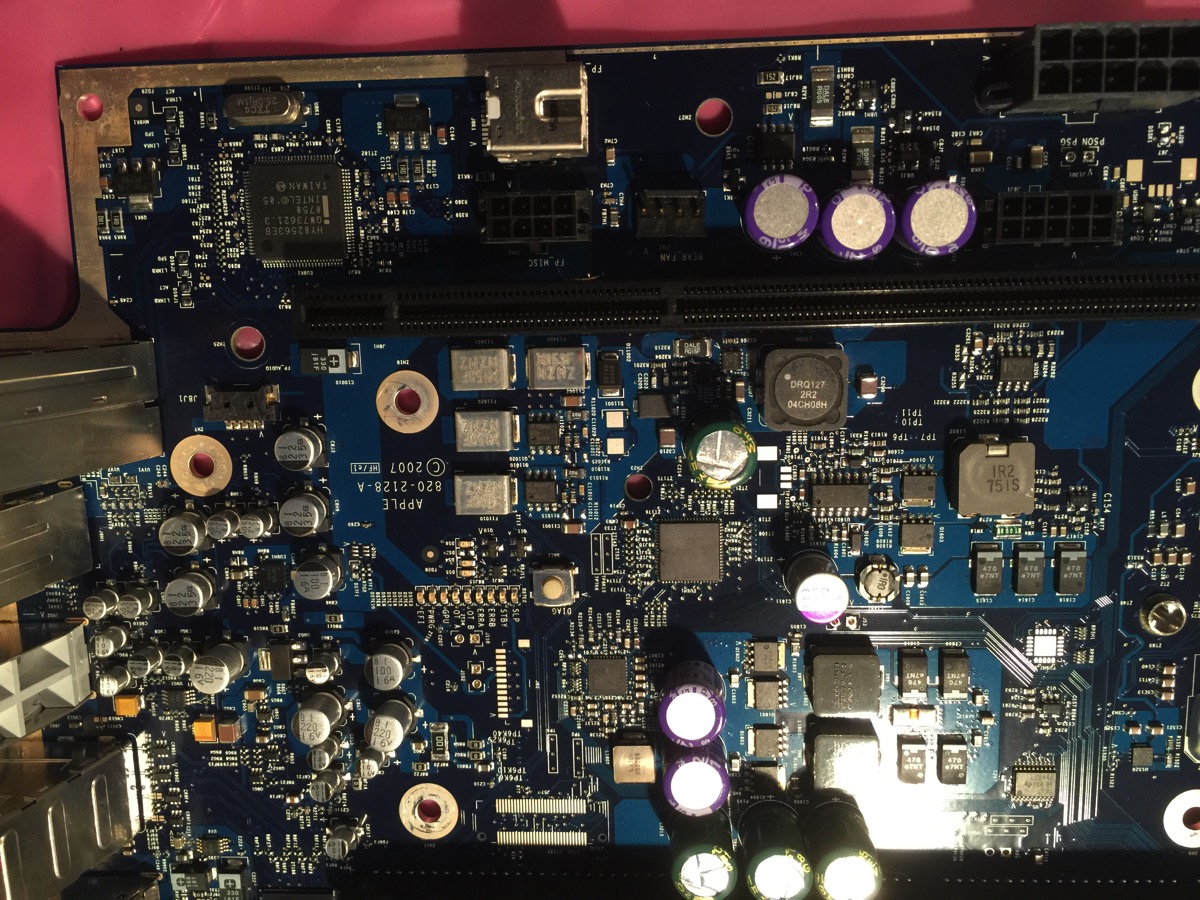
Old motherboard

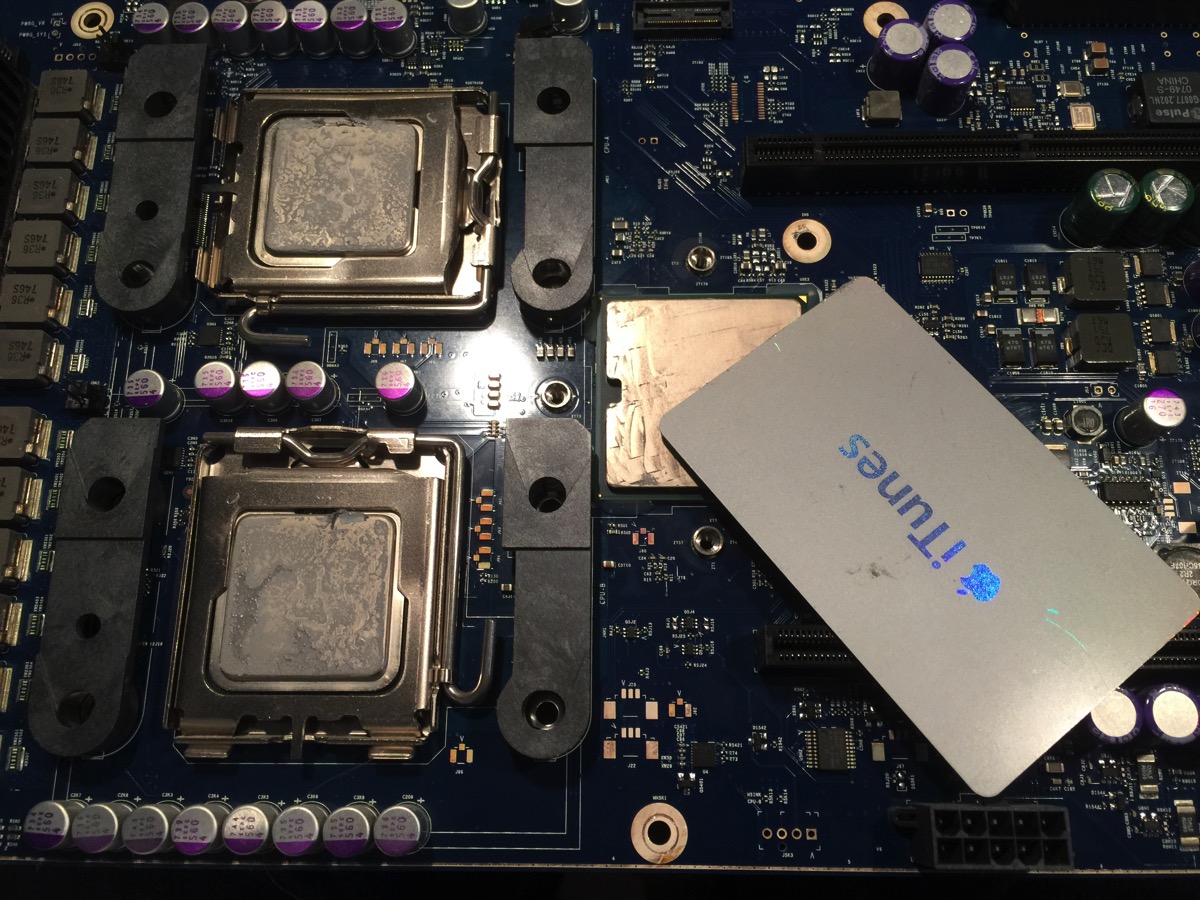
A good use for old iTunes cards: scraping thermal paste from the CPUs and the Northbridge. (The north bridge isn’t necessary, since this one is on its way out, but its a good trial run for the processors.)

Scraping paste

Use a decent cleaner and lint-free cloth to remove the rest of the old thermal paste after scraping it off with the plastic card.

Dissolvant

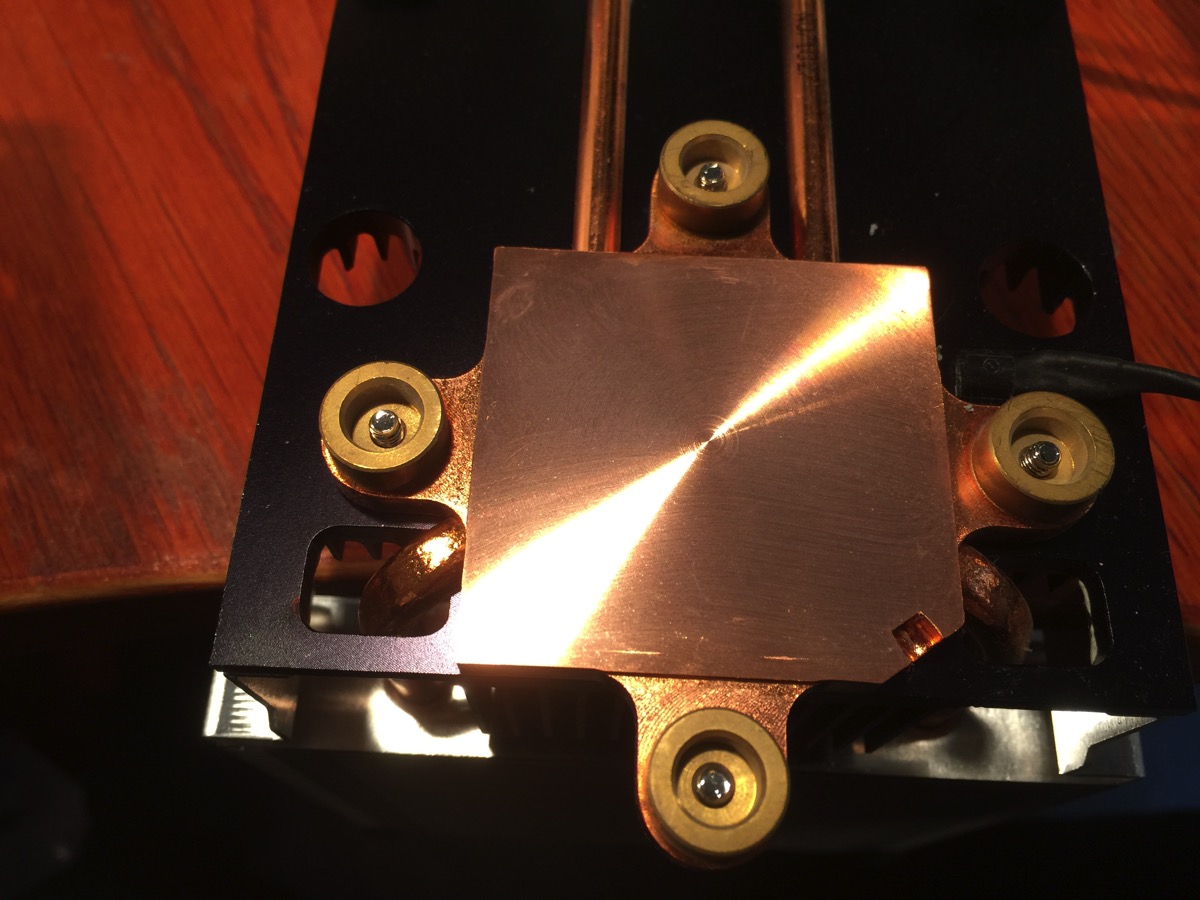
One of the sinks after cleaning. Looks great!

Clean sink

The processors look fine, too, after cleaning:

Clean processors

Time to strap up before removing the processors:

Antistatic strap

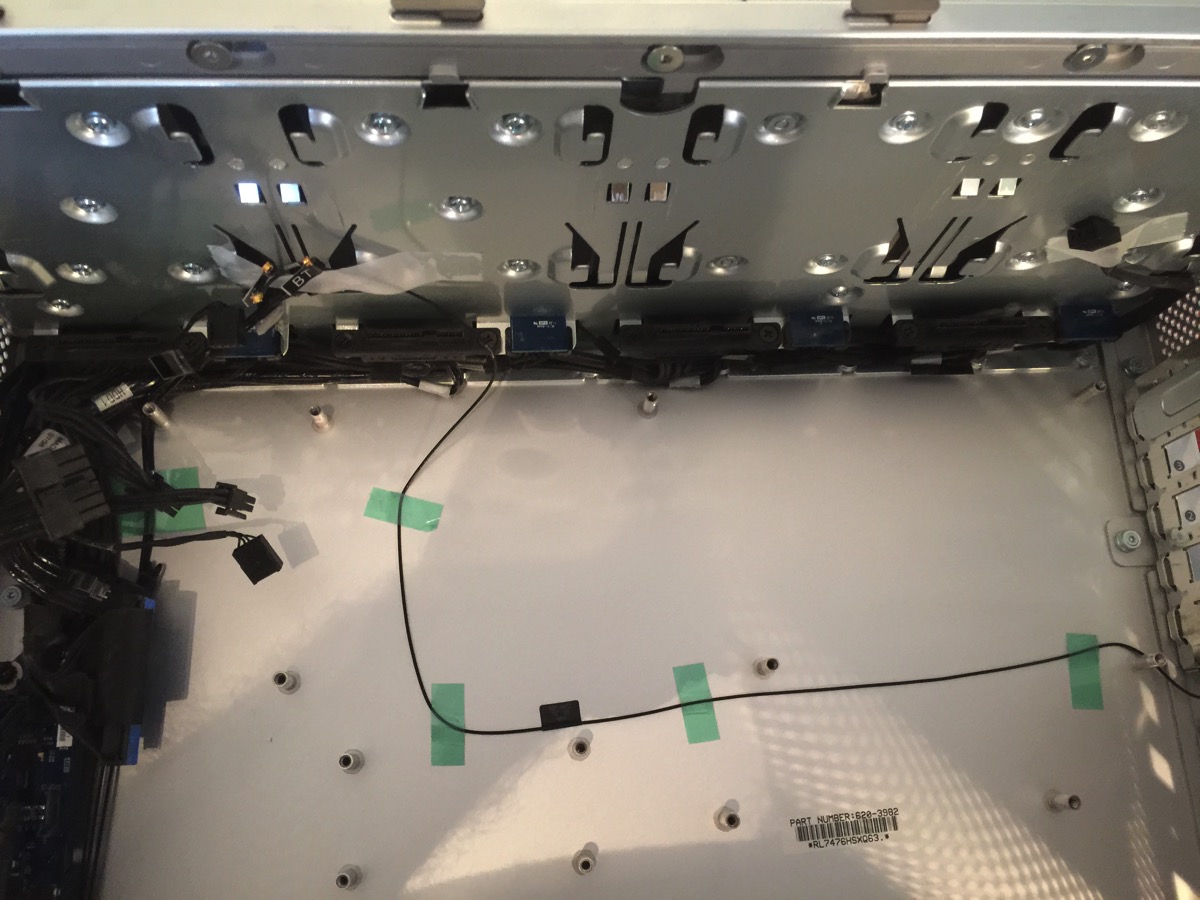
An empty case with a lot of loose cables:

Empty case

Putting thermal paste on the north bridge and the CPUs. I’m using the procedure recommended on the Arctic Silver site. Except I unintentionally modified it to be messier. With this procedure, very little paste goes on the sinks.

Past on chips

And then you put back the motherboard, the sinks and all the rest. And cross your fingers and boot. Oh, your machine now has a new serial number, but really, who cares?

I used the opportunity to blow away all the dust from all the parts using compressed and dried air. This machine has never been this clean before. 

Razer Mako click of death fix

I have the Razer Mako speakers on my desk. They consist of this heavy, huge amplifier/bass unit and two smaller round treble speakers. It’s a great sounding system, but a lot of them fall victim to the “click of death”. This is a failure mode where the speakers give a regular clicking or popping sound, about once a second, and no other sound comes out of them. As the system warms up, the popping disappears and they function fine again. Until the next time you switch them off and the misery starts over.

With these symptoms, I was pretty sure there must be a failed electrolyte capacitor in the power supply somewhere. The problem is knowing which one. Searching on the net after schematics for the Mako, I found a lengthy and interesting thread about this on the Australian Whirlpool forum (go figure…) where the solution is described very well. Someone, somewhere, figured out which capacitor fails, which makes the repair quite simple.

So, here’s what I did, in pictures. Disconnect the base unit from power, satellite speakers and the control pad.

DSC 0001

Turn it over. You’ll find 11 (I think) screws in the bottom plate. Remove them all. There’s one in the middle hidden by the label, you have to remember to remove that one, too.

DSC 0002

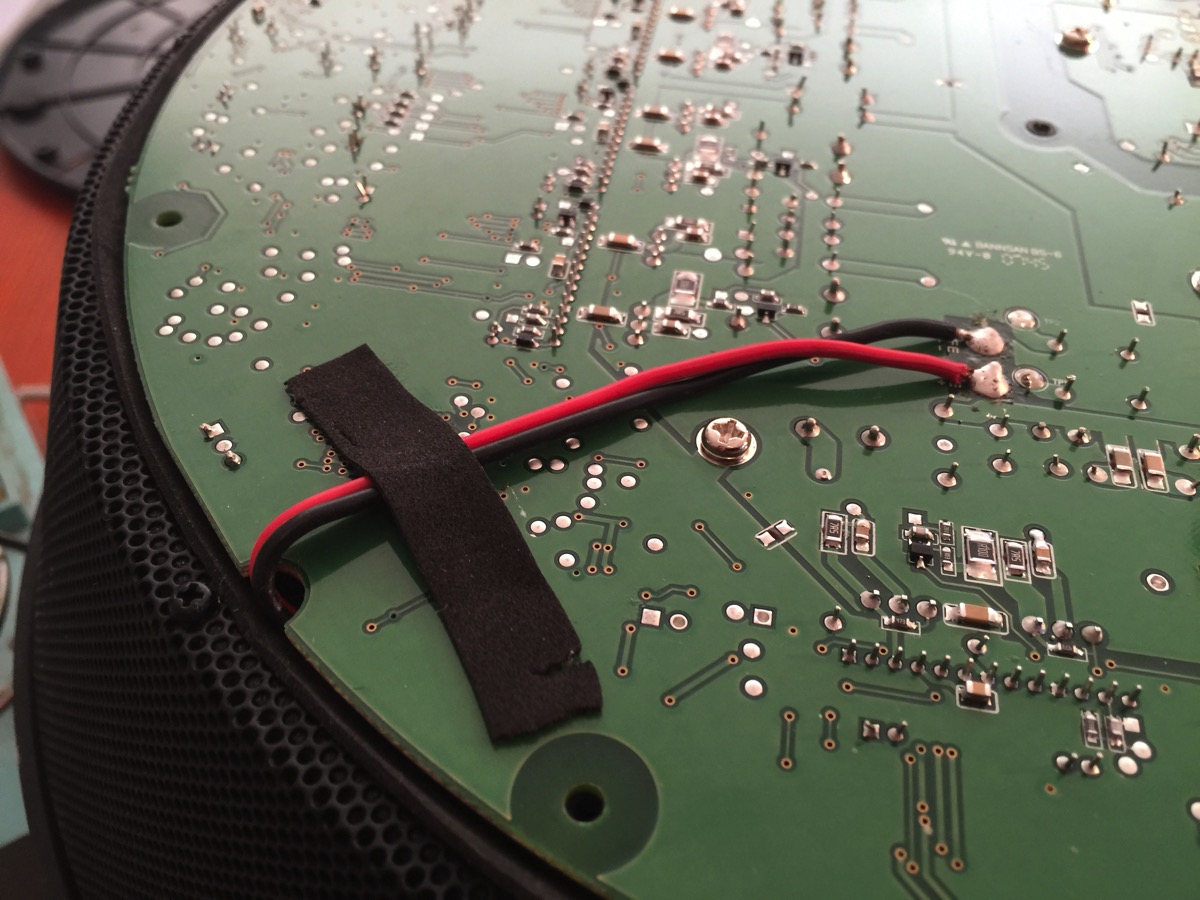
Lift off the bottom. The motherboard is connected to a switch in the upper case, in the picture that is in the upper right. To the left you see that it is held down by the red and black speaker cable. That’s the one we’ll remove so we’ll be able to turn the motherboard over. Heat the two pads with a soldering iron and remove the speaker cable.

DSC 0003

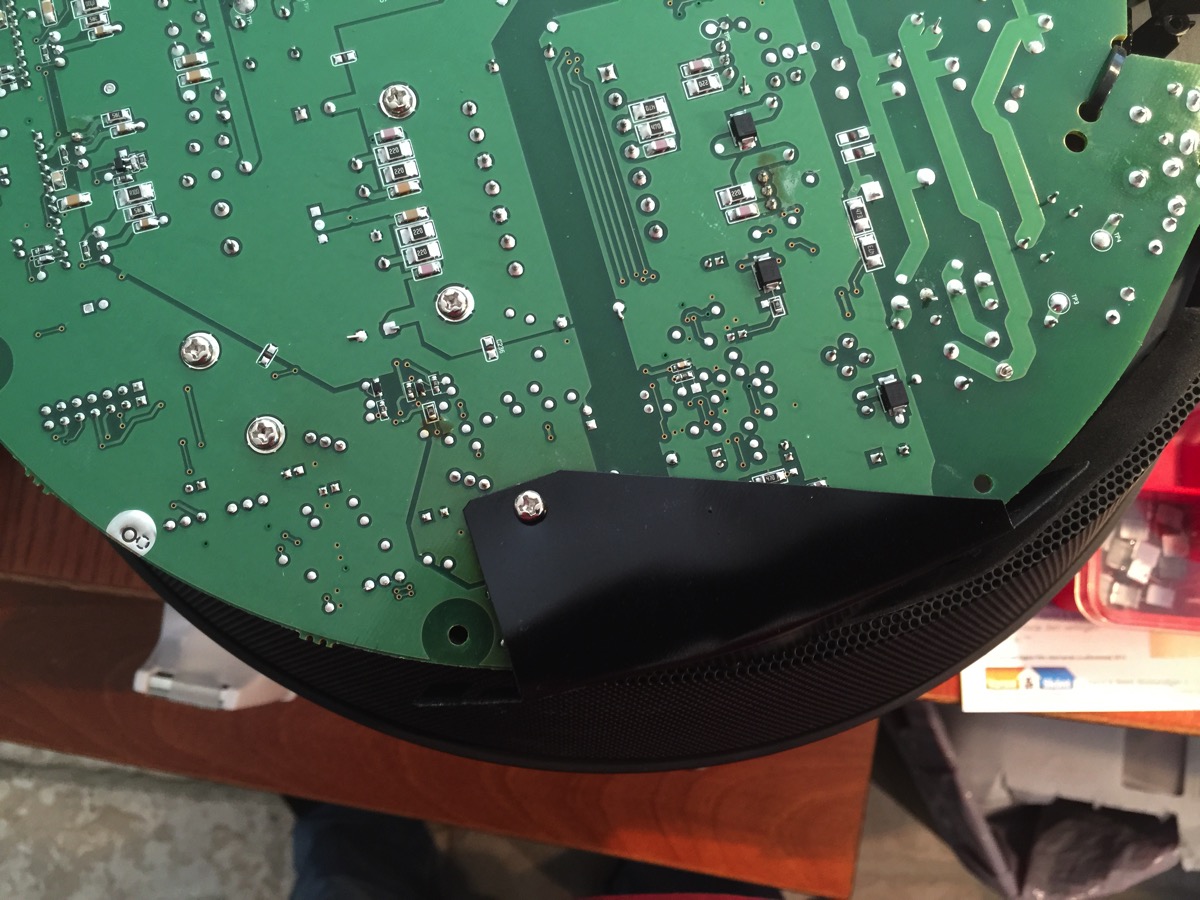
Turn the motherboard over. You can do that even with the power supply cables to the power switch in place. The electrolyte capacitor we’re looking for is marked “C125” and is the one with the red circle in my photo below. It’s a 47µF/25V capacitor. The negative lead is the one marked with dashes and is on the side away from the heatsink, i.e. pointing downwards in my photo.

IMG 2462

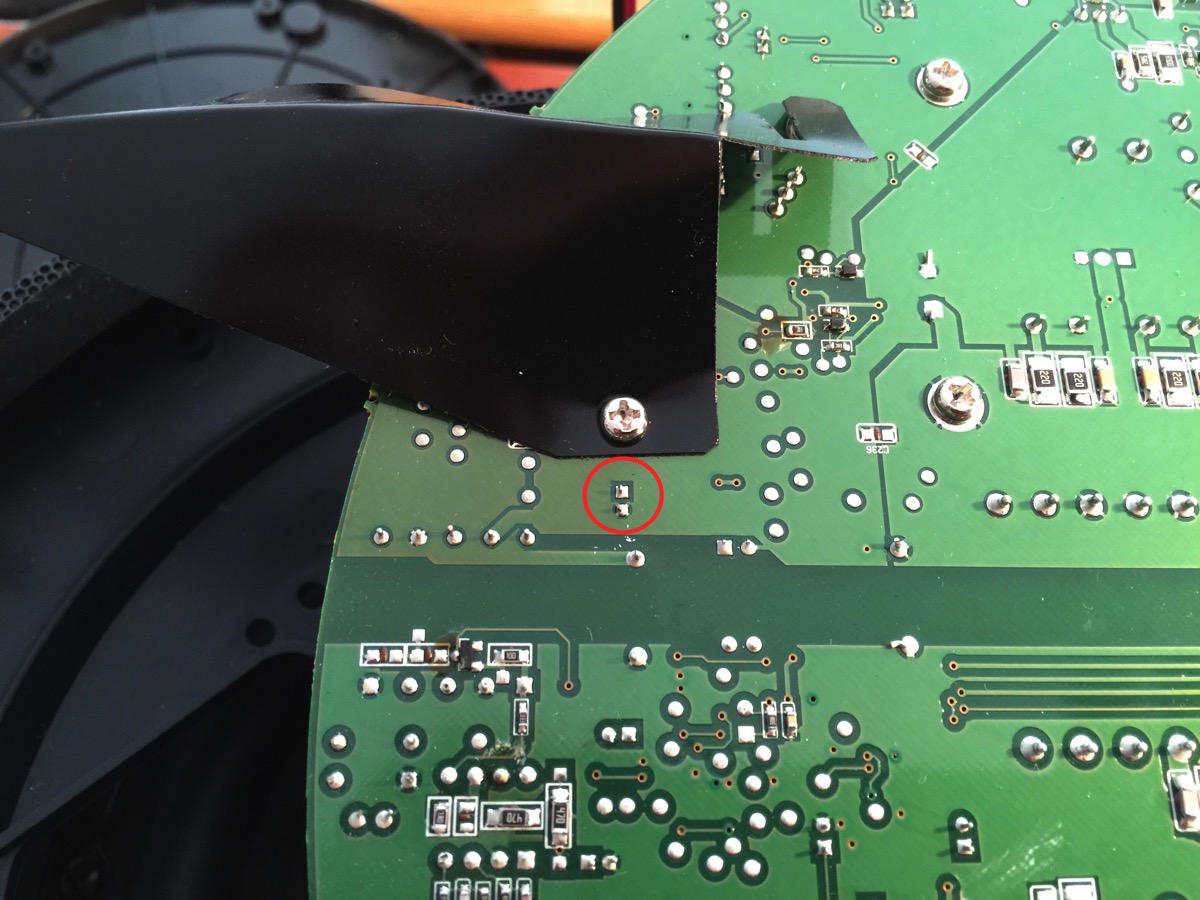
Turn the board over again (without twisting the power cables too much), loosen the screw holding the plastic shield in place, and twist the shield away about 90 degrees, since the C125 solder points are otherwise hidden by the shield. I’ve circled the C125 solder pads in the picture below.

IMG 2465

With a lot of patience, heat, solder suction, and solder wick, remove the old capacitor and clean out the solder holes. (Yes, I realize this isn’t always easy, especially since one of the pads is the ground plane and needs more than a little heat, but I can’t teach you to do this in a short few sentences.) Anyway, try not to destroy the circuit board by using too much heat for too long. Use only a suitable regulated soldering iron for this. If you do this right, the end result will look like this from above the board (the negative lead for the capacitor is marked as a filled in white field, downwards in the image). You can see daylight through the holes here.

IMG 2470

Seen from the solder side:

IMG 2468

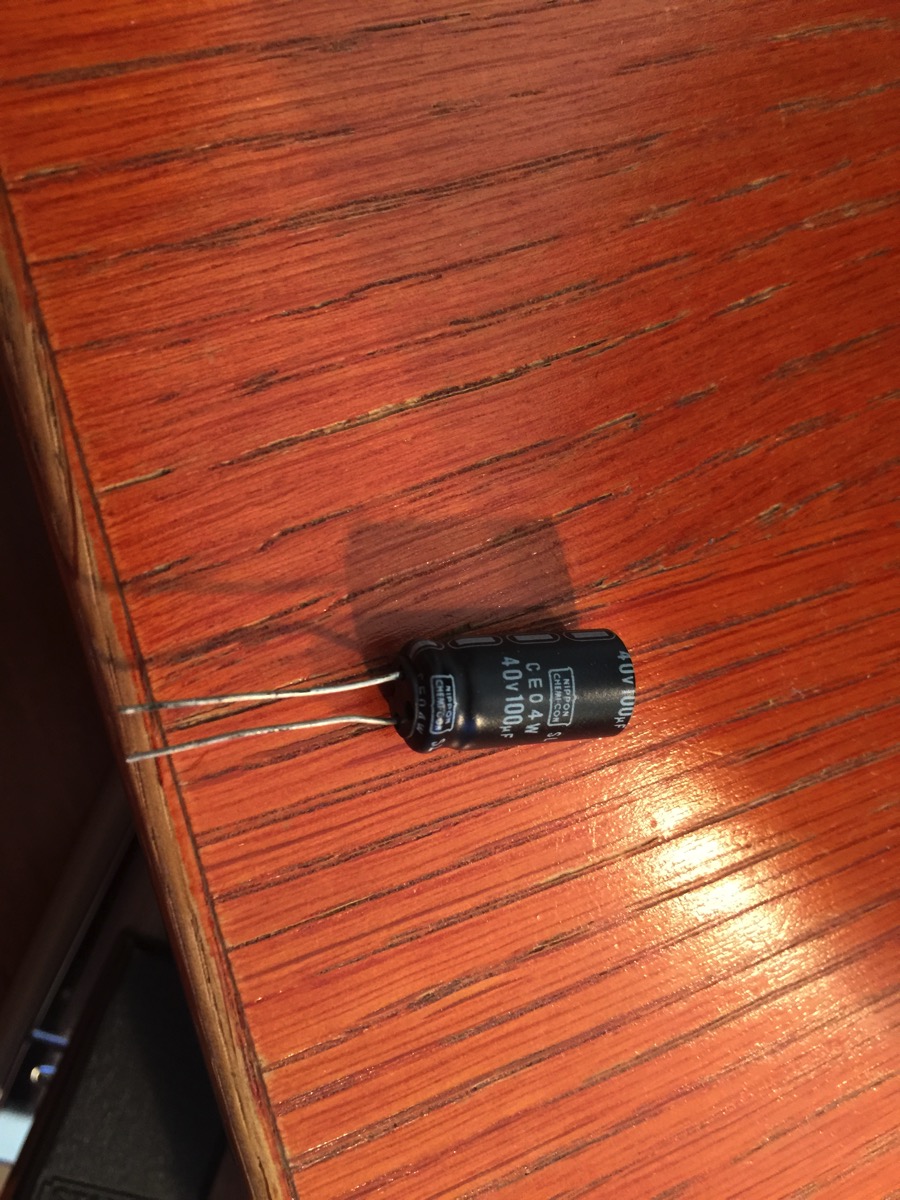
I didn’t have any 47µF capacitors, but I did find a 100µF/40V capacitor in my old stock. It’s very important that the voltage rating is at least as high as the original (25V). I figured that a higher capacitance would be ok, within reasonable limits (turned out it was). If you have to buy a new capacitor, splurge on the absolut best and most expensive you can find. The cheapest cost around 5 cents, while the most expensive can be as much as 15 cents. I’m not kidding. Of course, it may cost you 20 bucks to get it shipped and invoiced, though.

IMG 2471

A curious aside: an entire huge capacitor is missing here, replaced by a short. Wonder what the story is behind that.

IMG 2473

The new capacitor was quite a bit bigger than the old, but that’s not really a problem. Make really, really sure the negative lead is in the right hole, away from the heatsink, i.e. to the left in this image.

IMG 2475

Ready to solder on the other side. (When flipping the motherboard around, always check that you don’t twist those power leads too much.)

IMG 2476

After soldering and cutting the excess leads, you should have a good connection with no solder bridges. Don’t use too much solder, just barely enough.

IMG 2478

Rotate the plastic shield back into position and tighten the screw holding it in place (there’s a nut on the opposite side of the motherboard that you may need to hold still to do that).

IMG 2479

Reattach the speaker leads.

IMG 2481

All that remains is to put back the bottom plate and all the screws. There’s a really good chance your system will work fine, now. Mine did, with one exception: when switching on from standby, there’s a single sharp click from the speakers. I’m guessing it’s caused by my capacitor having an excessive value (100µF instead of the original 47µF). We’ll see if this turns out to be a problem or not.

Which new Mac Pro? The old one.

So with the new Mac Pro coming out, I’ve been torn between getting one of those or live with my old Mac Pro early 2008 for a while longer. Now, just estimating the price of the new Mac Pro, adding in a Thunderbolt drive storage and two Thunderbolt screens, the sum is way beyond what I can credibly argue myself into. And I’d be stuck with something that has much more processing power than I could invent excuses for, while still being a first generation product.

After a lot of arguing with myself back and forth, I decided to try to speed up my old Mac Pro with SSDs. I also have a bootcamp Win7 I would like to preserve if possible, which seems to preclude using regular SSDs, unless I use a lot of them. The solution seems to be a Fusion Drive (combined SSD and hard disk), where the bootcamp partition ends up on the hard disk proper.

The SSD I bought is an OWC Accelsior E2 480 GB PCIe card, and I combined it with one of my “old” Seagate Constellation ES.2 2 TB drives into a 2.1 TB Fusion Drive with a 300 GB Windows partition. I can access the Win7 through Parallels as a virtual machine, but without any speedup from the SSD (since Win7 is in its own partition), but right now I can’t boot from it. I moved it using Winclone, so I’m waiting on a response from them on how to proceed. Worst case, I can skip bootcamp, I don’t really need it.

But for all the other virtual machines through Parallels, and all the other software and files I have, the machine has become unbelievably snappy. The Fusion Drive has about 1 TB of applications and data on it, so the SSD part should be able to handle most daily tasks, once it balances out right. But already, I’m seeing some fantastic speedups.

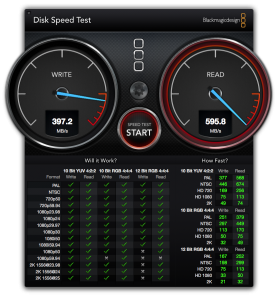
Just to make you envious, see the screenshot that follows. Theoretically, I should be getting 800 MB/sec, but I’m pretty happy with what I’m seeing. Can’t really see how much faster the machine can get in actual handling. Seems it boots apps and opens files as fast as the screen can be written. Almost.

BlackMagic Disk Speed Test on Mac Pro 2008

As a comparison, the test data from the “old” ES.2 2TB 7200 rpm drive that contains my old home folder, and which is still in one of the slots of the Mac Pro:

Disk Speed TestScreenSnapz002

In short, for a fraction of the money a new Mac Pro would cost, I got most of the benefit of one by adding this PCIe SSD card. (Nope, I have no relationship to OWC other than as a happy customer.)

The next step would be screens. I’ve got two 24″ Cinema displays, but with their 1920×1200 resolution, they’re getting cramped, especially when using the interface builder and storyboards in XCode. I’m still thinking it over, what to do about that. I already have an ATI Radeon 5870 card in the machine, so it should be able to handle bigger screens fine.

If all else fails, try Preview

I’m totally amazed at all the things Preview does in OSX Snow Leopard. I already use it for knocking out backgrounds, using the “Instant Alpha” tool in the “Select” dropdown. But what happened today is more interesting.

To my everlasting regret I got me a Canon Lide 60 scanner a couple of years ago. Canon’s hardware is pretty nice, but their driver support stinks, especially for OSX. This scanner costs me on average much more work than it should to keep going. Same for my Pixma 5200 Canon printer, by the way. Awful.

Anyway, I needed to scan a page from a mag to show on a slide. Hooked up the scanner, tried Canon Toolbox, and sure enough “Failed to open driver”. Internet next, user groups, downloads, complicated shit about uninstalling, reinstalling, rebooting the Mac Pro ten times. No joy. After a few hours (!) of this, I got an inspiration: hey, since I saw “Twain” mentioned, maybe Acrobat Pro 9 (CS4) could import it, instead of using Canon Toolbox? Sure enough, Acrobat found the scanner, looked it over, and promptly crashed.

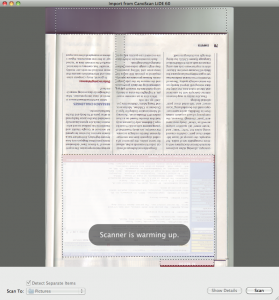
And then I got my second inspiration: check out OSX Preview. And yes, that one worked. Not only that, but it automatically calibrated the scanner, proceeded to analyze the page, divided it into sections, scanned it, and served it up already partitioned into useful chunks. See the screenshots below. All the time I was just sitting there watching, doing nothing. The only thing I had to do was select the image and hit cmd-R twice to turn it the right way up.

Jeez, that innocent looking little Preview app is becoming mighty useful for any number of things.

I probably should mention that the driver I installed came in a file called “lide60osx11131en.dmg” to be found, somehow, on Canon’s support site. It installs both the drivers and the toolbox, but the toolbox doesn’t work.

An ode to Juniper

I have a Juniper SSG-5 and the school I’m doing the network setup for also got one identical unit on my recommendation. I wanted to set up a fixed VPN between the two but failed miserably, so I logged a support request with Juniper on my machine, which is still in warranty but without any kind of support contract. Oh, boy, do these guys have great service.

After just a day I got an engineer connecting to my system with desktop sharing software and we together went through a number of different configurations. It wasn’t really trivial, since the first config took us nearly three hours. Then I had another question of how to implement more finegrained control over the firewall policies in one direction, but not the other, which had us online another two hours using desktop sharing. The final result was perfect and I’ve learned so much more about the details of autokey VPN tunnels.

I’m totally blown away by the level and quality of support I got for this issue from Juniper. Maybe this particular engineer was exceptionally good and persistent, but I have the impression that it is more of a rule with Juniper. When I bought the SSG-5 I thought it was a little expensive, but after this experience, I’ve totally changed my mind. The support level and quality makes it worth the price hands down.

No, I don’t have shares in Juniper, but after this experience I think I may get some.

Ode to a printer

We’re always complaining about stuff not working, but I just want to say how happy I’ve been, and still am, with our HP Laserjet 2300 DTN. Sounds like a commercial, doesn’t it?

Anyway, as I replaced the drum today, I checked the numbers. We got it in the summer of 2003 and it’s never failed yet. It has printed more than 64,000 pages, most in duplex, and has jammed less than 20 times total, according to the event log. The last jam was more than a year ago. It’s running as network printer for all the machines we have and it works flawlessly with any OS we’ve tried so far. The printouts are always just fine. Scrambled output has only appeared maybe twice during all these years. I can’t even remember when it last happened.

There’s always an up to date software package to be had from HP for any Windows version I’ve used. Admittedly, I don’t know about Win 7; I’ve stopped getting new versions of Windows a while back. It has been automatically located and installed on every Mac I’ve had, up to and including Snow Leopard, without any intervention by the user. Just like that. Options and all. Probably due to it running Bonjour flawlessly. I’ve never done a bios update.

As a final bonus, I’ve noticed that its actual consumption of cartridges is not one per 6,000 pages as advertised, but somewhere between 8,000 and 10,000 pages per cartridge.

I simply can’t believe what a good investment this has been. Amazing. Now let’s hope it doesn’t die just because I sang its praises…

OSX, FreeRadius, Netscreen, and me

Oh, wow, this was crazy. What I needed to get done is to have a Juniper SSG-5 firewall (which runs Netscreen OS 6.2) authenticate users from the FreeRadius server that runs by default in OSX Snow Leopard server (10.6.3). And I needed the SSG-5 to differentiate depending on groups on Open Directory on the OSX. But, man, is this poorly documented… the only thing you find in the OSX documentation is how to get an accesspoint to allow users in. That’s it. Not good enough.

You can click any of the images in this post to see the screenshots full size

First, a list of documents you may need, or I may need later and don’t want to lose:

dictionary.freeradius.internal – an Apple document listing the attributes passed to FreeRadius.

A usegroup message with some useful examples

Using OSX Radius with third party devices – has some info on hunt groups

Make sure radius is running
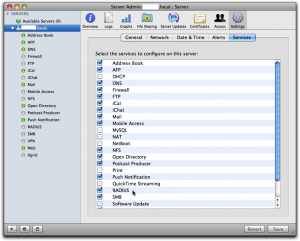
Via Server Admin, make sure Radius is selected in the services tab so it occurs in your list of services in the left pane.
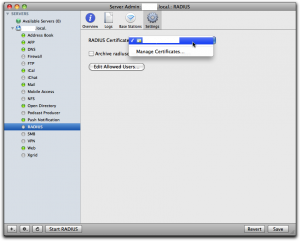
Then select “Radius” in the left panel, select “Settings” and click the dropdown for “RADIUS Certificate”. There you should either select a cert you already have installed on the server, or else select “Manage Certificates…” to go and create one. I already had one, and I had it created by CAcert, a free service for certificates of all kinds.

When you’ve got the cert sorted out, click the button “Edit Allowed Users…” and you’ll get to this screen:
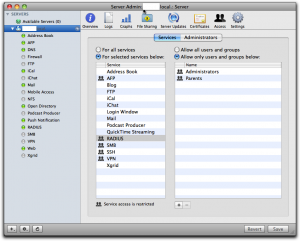
See to it that you’ve selected “For selected services below:” in the left half of the right pane and that “RADIUS” is selected in the list. Then use the plus sign below right to add all groups you want to manage through Radius. Don’t forget to click the “Save” button when you’re done.

If you have any regular wireless access points you want to add, you can do that through the Server Admin as well, but you can’t add any other devices this way.

Just to see if things are more or less right, try to start the Radius server and then check the logs. You can do that by selecting RADIUS in the left panel, click the “Logs” tab on top and then play with the “Start RADIUS” and “Stop RADIUS” button at the bottom of the screen:

If it complains about the lack of any clients, don’t bother. Just leave it off, since we’ll add clients through the command line shortly.

Once you’ve played with this for a while and are satisfied that it is not too bad, you can leave the Radius server off. We’ll start it from the command line later.

It’s important to understand that all the groups you select here, and only those groups, are copied over to the user database in the Radius server. Any users that are not in one of these groups cannot ever be enabled through Radius; they’re simply not seen by the Radius server.

Also important to understand is the fact that this is as far as Apple goes in its GUI implementation of Radius. That is, any user that is enabled for Radius this way can log in to any Radius enabled wireless access points on your net. They don’t make any distinction according to user or group as to what you can do, nor do they implement anything else but wireless access points. This means that for more sophisticated usage, you have to proceed on your own, largely through the command line and config files.

Add clients to radius

A “client” is a piece of equipment that will ask the radius server to authenticate users, so clients are accesspoints, firewalls, maybe switches and routers. Each of these pieces of equipment that you want to have call the radius server needs to be configured in the server with its IP number and a shared secret (password). This shared secred is the same on both sides, so each piece has its secret shared with the radius server, but each pairing has another shared secret. If you want to add just Apple supported wireless access points, you can do that through Server Admin, but for everything else you have to do it as follows.

To add a client to the radius server, you use the radiusconfig utility on the OSX server:

sudo radiusconfig -addclient 172.16.200.241 ssg5 firewall

After you enter this command, radiusconfig will ask you for the shared secret. Remember it, because this is the same secret we will need to enter in the SSG-5 later. A side note: the last parameter is the type and I gave it as “firewall”. As far as I can see, it’s purely descriptive and you can call it “bigbrownbear” for all the difference it makes.

If you check the list of “Base Stations” in Server Admin, you’ll should see this client in the list, at least if Radius is running:
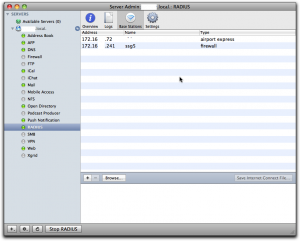
Add the DEFAULT entries to the users file

Even though Radius users are held in an sql-lite database under OSX, the users file still does exist and is read. In this file, we can add in rules that will be processed for any user that is accepted by Radius, so we can add on values to be returned to the Radius client (in our case, the firewall). In the users file, you also have access to some information from Open Directory on OSX, so the users file is the place where information is transformed from OSX Open Directory to Radius clients. This is where the magic happens. We write all our rules for the magic user “DEFAULT”, which matches any user accepted by Radius. More than one rule may match a real user, and all of the matching rules will be applied.

Open the “/etc/raddb/users” file on the server with pico as root:

sudo pico /etc/raddb/users

In that file, towards the end, in among the other “DEFAULT” rules, add this one:

DEFAULT   Group-Name == "Parents"
     NS-User-Group = "majors"

What this rule does is that it checks if the user under OSX in open directory belongs to a group called “Parents” and if so it sends the NS-User-Group attribute with the value “majors” to the client, in this case our firewall. We’ll add another rule:

DEFAULT   Group-Name == "Children"
     NS-User-Group = "kids"

Note: I made the group names very different on the OSX Open Directory side (“Parents” and “Children”) and on the Radius client side (“majors” and “kids”) just to make it extra clear which group is which.

Set up authentication server on the SSG-5

Now we have to tell the SSG-5 how to find and talk to the Radius server. Log in on the SSG-5, go to “Configuration” – “Auth” – “Auth Servers” and click “New”.

Give the OSX Server a name, any name. It’s used to refer to this server when you create policies in the SSG-5 later. Enter the IP number, and select the “Auth” under “Account type”.

In the lower part, select “Radius” radio button, set the “RADIUS Port” to 1812, which is the default on the OSX FreeRadius server. Set the “RADIUS Accounting Port” to 1813, even though we don’t use accounting in this example. In the field “Shared Secret” you have to enter the same shared secret you entered while defining the SSG-5 client on the OSX Server using radiusconfig (see above). Leave the other fields unchanged and click “Save” at the bottom of the screen.

Add external groups to the SSG-5

We configured the OSX FreeRadius, via the DEFAULTS in the users file, to return groups “majors” and “kids” depending on who is logging on. Now we have to set up these groups on the SSG-5 as well. Go to “Objects” – “Users” – “External Groups” and click “New”.

In “Group Name”, write “majors”, then select the “Auth” checkbox for “Group Type”. Click the Ok button, then repeat the process for the “kids” group.

Now we do a policy

Now we finally arrive at the writing of policies that make use of the groups. In this example, I’m going to limit access to the dn.se site, Sweden’s largest newspaper, and I’ll only make it accessible to OSX users that belong to the “Parents” group on OSX. To do this, I’ll first have to make a policy that by default disallows everyone from accessing dn.se, then add a policy that allow members of the external group “majors” to access it anyway (remember that the OSX group “Parents” is translated to the group “majors” in the users file, so the external group is “majors” on the SSG-5). Let’s first do the policy that disallows all access to dn.se for everyone.

Go to “Policy” – “Policies”.

Select from “Trust” in upper left, to “Untrust” in upper right dropbox, then click “New”.
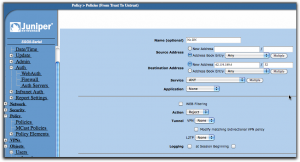
Use dig or nslookup from the command line to find the IP number for dn.se. As of the writing of this post, it was a single IP number: 62.119.189.4.

When the form opens, give the policy a reasonable name like “No DN”, leave the source address set to “Any”, but change the destination address to “62.119.189.4” and put in “32” in the mask field. The “Action” dropdown should be set to “Reject” and you can leave everything else as it was and click “Ok”.

Use the move tools in the policy list (far right) to move this policy to the top of the list. The policies are processed from top to bottom, so we want to make sure the rejection happens before any other policy may allow the connection.

Add another policy from “Trust” to “Untrust”, then fill it in as in the following screen:

Give it another name, in this case “Allow DN”. You can now select the destination address from the address book entry dropbox so you don’t have to type it in, it’s just a convenience since the SSG-5 now knows about this IP from the previous policy. The “Action” dropbox should now be set to “Permit”.

If this was all we did, we just simply nullified the previous policy, at least if we put this one above it in the policy list, and that would be pointless. Instead, click on the “Advanced” button at the bottom of the screen.
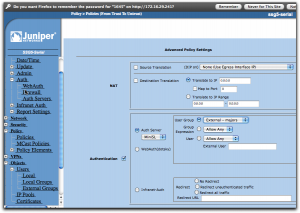
Now everything comes together. Enable “Authentication” by selecting that checkbox, then select “Auth Server” using the radio buttons. In the dropbox, select the auth server you created earlier, the MiniSL. Slightly to the right, you can select who is going to be authenticated and here you select “User Group”, then “External – majors”. If this selection isn’t available, check that you did define that external group as I described a bit earlier.

With all this done, save. In the list of policies, you should put this new policy at the top using the move tools in the last column so it ends up above the first policy we did that is set to reject connections to dn.se for everyone. The result should look like this:
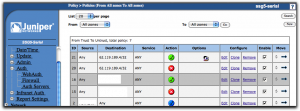
Testing it all

If you started the Radius server through Server Admin, go there and stop it first. Log in to the OSX server and open a terminal shell. Start the Radius server in debug mode from here by:

sudo radiusd -X

This should get your Radius server running and you’ll see how it handles requests. Now go to a browser on any other machine on the local net and try to open dn.se. You should get a login dialog from the browser itself and if you provide a username and password from someone who is defined in the OSX Workgroup manager, is in the “Parents” group, then you should get access, else not.

I hope it works for you. If not, explore the raclient tool as well, since it’s very useful for finding configuration errors. Once it all works, stop the Radius server on the command line and go start it from Server Admin instead, so it runs as it normally would.

A little remark: if you change settings in the users file, you have to stop and start the Radius server again each time, else it won’t see the changes.

I’m planning to do a post on hunt groups as well, but I haven’t done them yet, so it could be a while.

Additional notes

You will find files with all the predefined attributes in the folder /usr/share/freeradius. Each type of equipment has its own file. The attribute names I used above come from the file “dictionary.netscreen”.

Another neat machine

In my current upgrading of my local net, and in anticipation of my new ISP business account, which gives me a /28 segment of public IPs (16 adresses, of which 13 useable), I had to get VLAN capable switches to replace the cheapo Netgear Gigabit dumb switches I had. That way I can place my router/firewall anywhere I want without pulling a truckload of cables everywhere. I can also dedicate a public IP to a segment leading directly to a victim machine or virtual machine across a VLAN, for malware studies, and other little experiments.

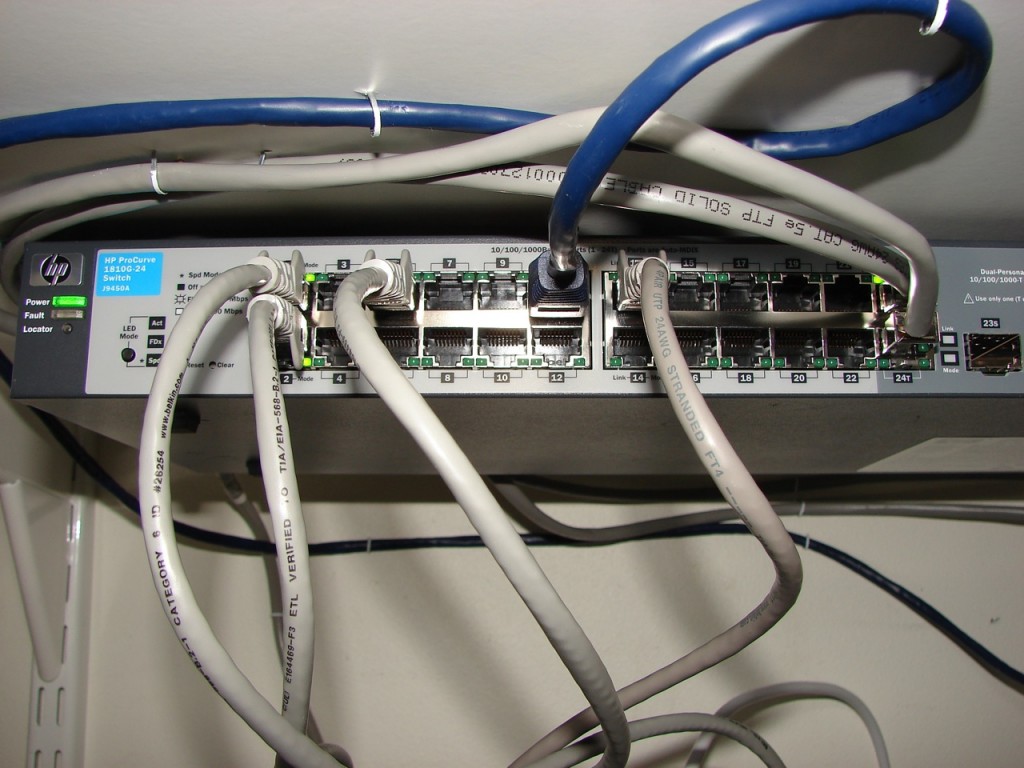
After a lot of soulsearching and getting up to speed on lightly managed L2 switches, I settled for two HP Procurve 1810G with 24 ports each. I’ll probably get another 1810G 8 port unit, too.

So, I put one in the office and the other in the back room. First and foremost, these little buggers are fan-free. No moving parts. Lifetime warranty, low power (8 W or so). The totally silent part was my absolutely major requirement.
DSC04392
This unit allows setting up using a browser and has trunking, VLANs, measurements and not least, monitoring ports. That is, I can hook into any other port and send that output through a selectable monitoring port. Ideal for sniffing on whatever port you desire.
Another totally unexpected boon was that I was able to read the entire manual and learn it all. This is the first time in maybe ten years I’ve ever been able to learn all the features of a non-trivial piece of equipment. And that feels so good.

Oh, and I discovered that OSX Snow Leopard, both server and client, has a super simple graphic UI for setting up virtual interfaces matching VLANs. All I need now is a router/firewall with a couple of connectors, a number of zones, and ability to match zones to interfaces and VLANs.

The cutest little muscle machine ever

I got me that brand new Apple Mini with Snow Leopard OSX Server unlimited edition included. This is such an adorable machine, you wouldn’t believe it. It has everything you can wish for in a server, as far as I can make out after just a couple of hours with it. It’s super easy to set up and to monitor. It’s small, it’s beautiful, it’s almost totally noiseless, and seems to use hardly any power. When you feel the case, it’s just barely warmer than the environment and the same goes for the power supply. When I switch off everything else in the room, I can only hear the server running from less than a meter’s distance. It seems to produce about the same noise level my 13″ white MacBook does when it’s just started and perfectly cool. In other words, practically inaudible. Still, it’s running two 500 Gb drives in there, which I’ve set up as a mirrored (Raid 1) set.

I’ll probably brag about this system some more once I get to know it better. But meanwhile, it’s the nicest computer purchasing experience I’ve ever had. Except for the Mac Pro. And the MacBook. And the iMac, of course. And the iPhone. And Apple TV.

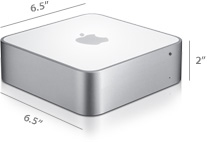
server_dimensions_20091020